The Creatorpreneurs Newsletter Issue # 6: IMPROVING YOUR CONTENT

 
The Creatorpreneurs Newsletter – Issue # 6 – IMPROVING YOUR CONTENT
By Marc & Lisa Sylvester • Issue #6 • View online
Hey Creatorpreneur!
Marc and I are here to help you really really improve your content today (and it’s not about graphics). I’m talking artificial intelligence (AI) meets practical use!
You’re already quickly creating your visual content with The Graphics Creator. But how about putting out amazing written content for your website, social media, and marketing that fits perfectly with your images… and just as fast?!
– and you get to decrease stress, brain strain, and time spent re-wording and overthinking your content!
I’ve mentioned in a previous newsletter that I started a new niche blog this year, which is just one way I’m using this new AI tool! I’m actually getting help writing my blog content… it’s not magic and it requires work (after all, you’re still the expert, not AI).
But it IS amazing how much faster you can write and how much better the results are.
Here’s what I’m talking about…
-Lisa


CREATORPRENEUR TOOL OF THE WEEK
Have you played around with any “artificial intelligence” (AI) apps lately? If not, you’re going to be as amazed as I am. AI just keeps getting, well… smarter! In leaps and bounds!
Enter Rytr, which does exactly what its name suggests… write!
Rytr will help you write high-quality copy for blogs, emails, your website, ads, social media posts, and more.
Any AI writing app will admit that it’s not perfect… but they’re all constantly striving to get better than the competition.
The truth is, you owe it to yourself to check out Rytr if you spend any time at all writing content. Marc can’t stop drooling over it… okay, I’m pretty smitten as well. Truly, this is a tool for every Creatorpreneur.
The best thing is that you can start writing for free (you’ll get 5000 characters each month).
But if you do decide to pay the $29 to upgrade your account to unlimited monthly writing, we’ll earn a commission as an affiliate (if you click on our links)… and you’ll have endless content at your fingertips.
Just so you know, we were paying $99/month for a competitor’s tool… and Rytr has way better editing features, so we’re pretty happy with our decision 🙂
GRAPHICS CREATOR VIDEO OF THE WEEK
If you’re going to get help writing your content, then creating your own video just got even easier.
You can actually write a sentence or two for each frame with any AI writing tool… create images for your video like Marc shows you below… and boom! You’ve got yourself amazing marketing content!
Watch me Do it! – How to make your own Explainer Video (for 2020)
PRODUCT OF THE WEEK- 50% Savings!
When you’re writing content, you’re going to need a way for readers to take action on what you’ve written. So, this handy pack of Buttons, Banners, and Badges is the perfect solution (just add text and you’re done).
And I just marked them 50% off for you through Sunday!
The price is already marked down… no coupon needed.


CREATORPRENEUR TIP OF THE WEEK
Don’t spend hours writing and re-writing content when you can get quality help from AI! We can’t do it all by ourselves, even as Creatorpeneurs. Do yourself a favor and get Rytr or research other AI Writing tools.

5 Social Media Graphics You Can Design For Free

Need a quick graphic for your social media post? Want to make one yourself, but don’t know where to start?

I’m going to walk you through creating 5 types of social media images using The Graphics Creator! (And I’m going to show you how to create them all… for free ???? )


For this article, I’m going to assume you already have The Graphics Creator software installed on your machine, or you have access to the Online Graphics Creator.


What makes good social media graphics?

In my humble opinion, it’s two things:

• They should be simple and eye catching,

• and your social media graphics should contain SOME kind of “call to action” (‘click here’, ‘buy now’, ‘visit the website’, etc …)

That’s all there is to it!

Let’s launch the free Graphics Maker tool. The Graphics Creator is the best free tool for creating awesome designs and sharing them with your friends on social media. You can create, edit and download designs and use them on Facebook, Pinterest, YouTube and other social media platforms.

The Graphics Creator has a clean, simple interface that makes it easy to create custom images. You can use this tool for creating social media graphics from scratch, or by installing a few of the ‘add-on’ packages that contain pre-made templates. A super time saver!

The possibilities are endless!

Here are 7 social media graphics you can create instantly with The Graphics Creator


Create your own Facebook Post Image

Facebook post images are good for promoting your business or sharing information with friends.

The recommended size of a Facebook post is 1200 x 630 pixels.

Using the Graphics Creator, Choose “NEW” and set the canvas to 1200 x 630.

Now let’s search the stock photos area to find something that relates to our business. For our example, let’s assume we walk dogs for a living.

Push the “Photos / Videos” button and search for something like “Dog Walking”:

Just slide the image onto the canvas. Easy.

Now, let’s Include a Call-to-Action (CTA) so your social media viewers will “take action” on the your social media channels or blog post. Create some CTA words like “We’ll walk your dog! Visit our website for more info…”, or “sign up for tomorrow’s Dog-Walking Workshop!”

you can even get creative with your blog posts or social media graphics and tell your visitors to download your newsletter, ‘find the link in the first comment’ below. It’ll make them read your post and hopefully ask a question or two.

The Graphic Creator software has over 1000 fonts built in and you can also use the fonts that you have installed on your computer.

Here’s our final Facebook post image!

(you can use this image on Twitter, Instagram or any other social media platform)


Creating videos for social media

You can create more than stationary social media graphics …another great way to stop your viewers from scrolling is to create a “motion graphic” and upload it as a Facebook post. Motion graphics will create a quick and easy way to show your visitors that you care about what they are watching.

Uploading a motion graphic may be the difference between attracting new followers… or not!

Here’s how to create a motion graphic for Facebook

https://youtu.be/oz-58ZQQa40

Create your own YouTube Channel Art

Now it’s time to get your YouTube channel art in order. The look and feel of your YouTube channel is most likely the first impression your potential customers will see when they visit your channel and it needs to be memorable, attractive, and most importantly – yours!

Using the Graphics Creator and The YouTube Add-on Set, you can choose from hundreds of templates or upload your own image and customize it however you like.

You’ll never have another boring video thumbnail again!

Choose one of the YouTube templates and Create custom YouTube thumbnail images


Create a Pinterest Pin – with a motion background!

Pinterest is one of Lisa’s favorite social media platform. The best way to get your pins noticed is by using a graphic with one of your keywords in the text.

Pinterest now allows you to create “video pins”. So using the Graphics Creator, you can create your Pin, then apply a video background (see the video above).

Did you know Pinterest’s Ai can actually read the words on your pin? It can! and it’s how you can rank a little higher than your competition

Create your own quote images

The great thing about the Graphics Creator is that you can create designs for any occasion. Maybe it’s somebody’s birthday or you just want to create some fun. You can make engaging social media graphics that are memorable for your Facebook or Twitter pages.

Whatever the occasion, you’ll be able to create eye-catching social media graphics and images that your viewers will notice.

Hop onto Google and type in “quotes for birthday” or “Quotes for the summer” – you’ll get a ton of great ideas and great quotes that are freely listed all around the web.

Next, open a new canvas and push the “Photos/Videos” button.

You can merge any of the quotes with photos to create stunning images and memorable memes. The Graphics Creator is a powerful creative tool.

Here’s an idea: set up automated timed released posts. Create 30 quote images and set them up to be released at the same time every day. Create an engaging social media posts that will magically appear on people’s feeds in the morning, noon and night.

It takes seconds to create a professionally designed quote with your favorite photo or video – The Graphics Creator is so easy to use:

graphics creator create a quote

It’s easy to get overwhelmed with the amount of time and money it takes to create social media graphics. But, you don’t have to spend a lot on either one! With The Graphics Creator app, you can generate free images for your blog posts or Facebook ads without any design experience necessary. You’re welcome ????

The Graphics Creator makes creating your own social media graphics a breeze Designing (and sharing) professional-looking visual content on your social media sites is fun!

Get started today! Create images that stand out – Simply sign up for a free account, open the app, select any of the professionally designed social media templates from our library (or upload your own images), customize with text and photos, then share!

If you have any questions about using this tool or want help getting started creating visuals for your brand’s next campaign, reach out to us! Just visit the support page.


Creating Your Own Ebook Cover and Mockup Designs – The Ultimate Guide

Hi there Creatorpreneurs!

One of the most common questions I get from entrepreneurs who work at home is “how can I make my own ebook cover?

Creating your own eBook Cover AND Mockup Designs

In this article, I’m going to go over the two main ways:

• Do it yourself with ebook cover templates:

• Or, you can hire a designer from a marketplace like Fiverr.com

I have some insider tips that are going to help you create a professional looking ebook cover in just 3 simple steps. Then I’ll show you 5 ways to use your designs for marketing to get more traffic, more clicks and hopefully, more sales.


How much do graphic designers charge for book covers?

First, let’s figure out if you should hire somebody to create your ebook cover, or do it yourself.

Most designers charge between $20 and $50 for an ebook cover design. Typically, if you find designers on Fiverr, for example, they’re most likely using the very tool you’ll see below to make the same eye-catching book cover images you can create yourself!

Some providers DO offer quality work however, and they’ll offer an extra package or two that may include the cover design, the 3D mockup of your ebook, and maybe a few additional items like a background image or a text overlay.


How about doing it yourself? Is it easy? is it time consuming?

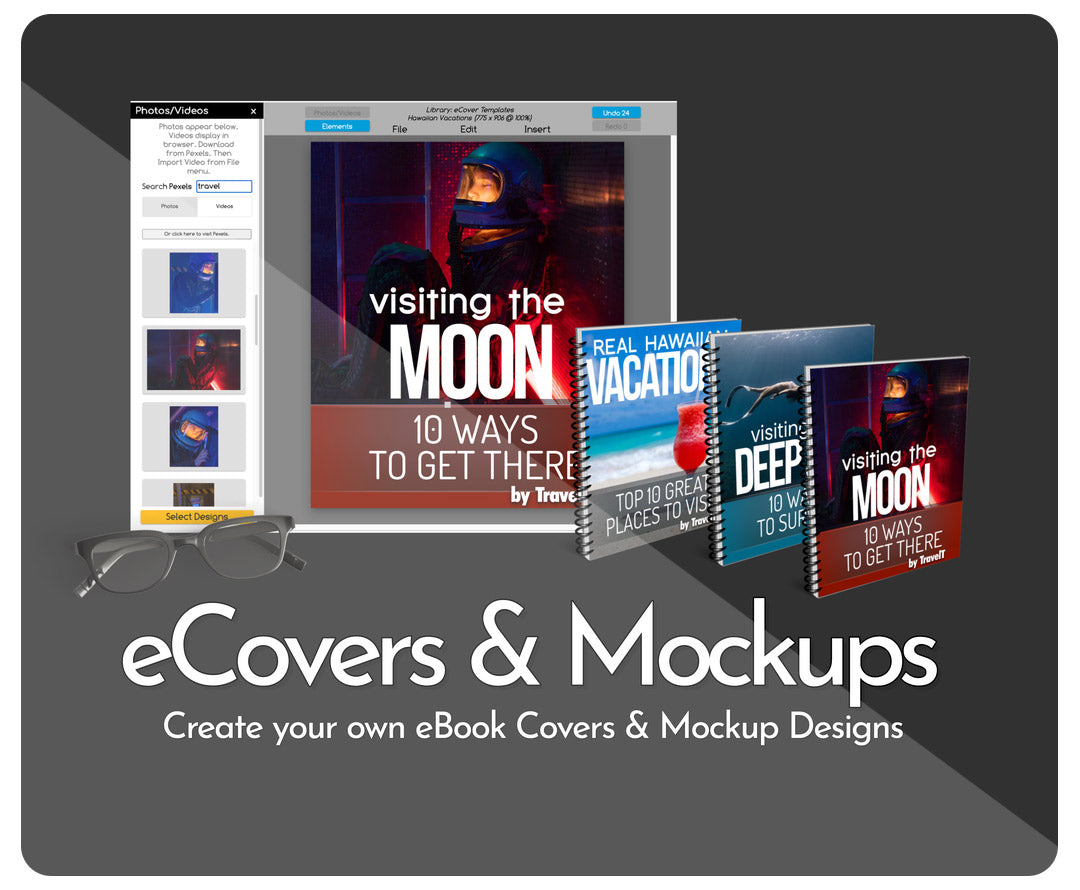
It’s super easy when you use the eCover and Mockup set for The Graphics Creator. You’ll start off with a ton of eye catching software box mockups and ebook cover templates. You can tweak the ebook cover title and modify or combine them any way you want!

Create Your Own eBook and Mockup Covers
ebook cover templates from The Graphics Creator

Edit them in a few minutes; Double click on the text to change it. Add different images from the stock photos library, drag and drop additional elements onto the canvas like background images and add headlines … for free! No extra charges.

Download as many designs …and as many revisions as you want without being charged extra. You can also save your ecovers and mockups for later use, which will save you time AND money. Keep saving your designs! It’s almost like getting free ebook covers!

You can actually have a stunning ad for free at the same time! Check out the mockups below.

How do I design my own book cover?

You don’t have to be a designer in order to create your own book cover! Thousands of people all over the world are using The Graphics Creator software (and our new online graphics creator version). It’s by far the easiest way to design beautiful mockups. You can download the software for free (or try the free 1-week trial of the online version).

Step 1: Select one of the cover templates.

Add your title and author name to the book template. Adjust font size, color, text and more! Select the blue “elements” button, you can drag and drop different graphics onto your cover design.

click on the “photos” tab and drop in nice background (over a million photos are included for free) onto your ebook cover. Download your finished book graphic as a .png or .jpg file.

Step 2: “Map” the image to a 3D mockup design of your book image

Next, launch the 3D model collection. It contains hardcover book mockup, software boxes and others. Choose one and it’ll appear on the canvas. Now you can simply drag your stunning cover from the last step right onto the 3D mockup.

Select one of the 3D Mockup covers

And Step 3: Add more design elements

you can even design a full on ad if you’d like! Just add a text headline and some other elements like a nice background image. This tool makes it easy.


3 things you can use an eBook Cover Design for

Showcase your mockup or ebook design marketing yourself in a professional manner.

Have you ever seen the thumbnail graphics on fiverr? how trustworthy do some of them look to you? The graphics that DO look appealing appear far more trustworthy don’t they? You get what I’m saying.

Let’s say you’re creating a free PDF ebook you’d like your customers to download. The cover image will be the first thing potential customers see, so it’s important to design something that captures their attention and sets you apart from your competitors.

Choose a template and just follow the steps above and you’ll be able to accomplish this small task.

Use your new designs to make money by selling the ebooks design on Etsy or other sites that sell digital products

The Graphics Creator gives your full royalty free and commercial rights to sell what you make with the software. you can start a new business designing book covers and mockups. the latest version of this program comes packed with templates that are optimized for Kindle books. There’s a big market for Kindle book covers!

Use your new ebook designs as social media or blog post headers

The more blog or social media posts you write, the more changes you have of getting google to notice you. The more Google notices you, the more traffic you’ll get.

The eCover gives you professional pre designed templates and everything you need to make featured Images for your blog pages.

(there’s an online version you can use to create your ebook cover and mockups too! grab the free trial and see how easy it is.)

Creating a beautiful ebook cover is quick and easy.

You can do it yourself in about 10 minutes. You’ll never again pay high prices for a book cover designs, and you’ll always have full control over the details.

Get the 3D eCover and Mockup Creator. It’s fun and easy to use.

Now go out, design something amazing.

– I’d love to see what you come up with so please share your book covers and mockups in our Creatorpreneurs Facebook group – or point to them in the comments below!

How to Make a Cartoon Character Without Drawing (No Skills Needed)

You’re not an artist and you can’t even draw a stick figure but you want to create cartoon characters for your business or creative project. However, you probably don’t want to spend hundreds or even thousands of dollars having a professional artist make them for you.

Good news! You can easily make a cartoon character without having to draw it yourself. There are online tools and downloadable software that’ll let you create what you want.

Here are five different ways of creating the cartoon characters you need:

  1. Make a simple avatar that represents yourself. This is usually good for profile pictures and other small images.
  2. Use an actual character creator tool: Build a personalized character with ready-made drag and drop graphics.
  3. Make a cartoon character out of a photo, your own or others.
  4. Hire a professional designer.
  5. Use professionally designed, hand-drawn characters.

I’ll tell you more about these options below, as well as how much each will cost you.

How to Create an Avatar

Use a Tool to Personalize Your Graphic

How to Make a Cartoon out of a Photo

How to Make Comic without Drawing

[DISPLAY_ULTIMATE_SOCIAL_ICONS]

How to Create Your Own Brain Teaser Images with Answers

Brain teasers are fun, challenging, and super helpful when it comes to engagement and attention.

More importantly, visual images of riddles and puzzles can help businesses and educators meet their goals much easier than a string of words.

You can create your own brain teaser puzzle designs with a good logic question or riddle and a puzzle design template. You’ll need graphic design software created for people without Photoshop knowledge or any design skills.

The truth is, trying to find puzzle pictures that meet your needs is frustrating and sometimes impossible when searching the internet.

And, if you do find something you like, you’ll probably have to purchase each design.

Further, brain teaser pictures may be of poor quality, use images or design elements that don’t make sense for your purpose, or may even be illegal to use due to copyright ownership.

A simple solution is to create your own brain teasers. Making them is easy and gets you exactly what you want and need. Just pick a template, drag and drop the images, change the text, and you’re done!

No matter whether you want to use one for business, education, social media, or just for fun, you can make a picture puzzle and answer graphic in just a few minutes.

And I’m here to show you how. I’ll help you decide which brain teasers you need and show you how to create your own visual brain teaser with a separate image for the answers.

Which Type of Brain Teaser Image Should You Create?

There are several types of brain teasers that can be in the form of puzzles or riddles.

Each type might be used for different reasons although all are good for sharpening the mind and encouraging concentration as well as provide entertainment.

Decide which of these 4 types works best for you:

  • Logic: Here you must follow the logical steps in order to solve the problem.

    Example: Your mother’s brother’s only brother-in-law is asleep on your couch. Who is asleep on your couch?

  • Mathematical: Math is a globally understood language. But that doesn’t mean these are easy to solve.

    Example: One family wants to get through a tunnel. Dad can make it in 1 minute, mom in 2 minutes, son in 4 and daughter in 5 minutes. No more than 2 persons can go through the tunnel at one time, moving at the speed of the slower one. Can they all make it to the other side if they have a torch that lasts only 12 minutes and they are afraid of the dark?

  • Lateral: These types of brain teasers require more creative thinking.

    Example: If you were to put a coin into an empty bottle and then insert the cork into the neck… How would you remove the coin without removing the cork or breaking the bottle?

  • Word-Tricks: These riddles are often much more simple than they seem.

    Example: What can travel around the world while staying in a corner?

Whichever type you choose, you’ll want to create a picture image of it, rather than just posting it in word format. Just think about which one you’d rather solve?

A boring word riddle like this:

A woman was 70 years old in 2000 but just 60 years old in 2010. How can this be?

Or an easy-to-read, colorful picture riddle like this?!

Visual Puzzle with riddle

How to Design a Brain Teaser Image (All By Yourself)

It’s unlikely that you’re reading this because you want to create just one brain teaser. You most likely want to have access to ongoing puzzles and riddles for your business, social media, or your classroom.

By making them yourself, you’ll be able to match your brand’s color, add your own logo on it, or choose the perfect colors, fonts, and graphics to match whatever project you’re working on.

So, let’s get you set up to easily create your own brain teaser pictures any time you want them.

Here’s how to make your own visual brain teaser in just a few minutes.

First, you need the templates and software that’ll make it easy for you to make and re-create as many puzzles as you want.

Get the customizable Brain Teasers Puzzle Templates right here!

Next, once you have the software in front of you, choose the Brain Teaser Puzzle templates to work with. Then pick a template based on the type of brain teaser you need or want. You can refer to the list of types mentioned above.

Now click on any object you’d like to move and drag it where you want it to go. Make it super simple by only changing what you really need to.

Here’s an example. Start with this template:

Then just change the image behind the graphics. In this image, I just selected “Photos/Videos” on the tab at the top and searched within the software for the picture I wanted.

Customized brain teaser image with photo background

And I all I had to do was drag the image directly onto the canvas.

However, you could also change the font (select from thousands of them), color of the outline on the text, or add a mascot or logo to the image.

Finally, if you want to customize it even further to fit your needs, consider using these features of The Graphics Creator to make the perfect image for your business or classroom.

  • Duplicate an object (so you can make 9 apples instead of 4, for example)
  • Add a shape from the pull-down menu
  • Change the text or font
  • Change the text or an object’s color
  • Re-size any object or text by grabbing the “handles” and dragging bigger or smaller or wider and taller.

All of these changes can be made with the click of your mouse! Check the pull-down menu at the top of the software to see several feature options.

Additionally, you can actually replace any of the design elements by either importing your own, or simply choosing “Elements” in the menu and selecting new objects to drag and drop onto your canvas.

How to Find the Answers to Your Brain Teasers

You can also find all the brain teaser answers within the software. The answers are actually templates themselves… so you can modify them too.

Just click on the “Elements” tab, scroll to “Viral Puzzle Graphics” and choose “ANSWERS”.

If you want to show the answer for all to see, then you can create it from your finished, original brain teaser design. Here’s how:

Once your design is completed, make sure to “Save”. Then choose “Save As” so that you have another copy of your design. Then you can modify it to add the answers!

Brain teaser image with answer

How to Use Brain Teasers in Your Business

There are so many ways you can use brain teasers in your business. although many use them for consulting or interviewing, the most common place to use them now is in social media.

You’ve heard of social media posts going “viral” of course. But I bet you’re still wishing one of your posts would go viral.

But let’s be honest, it’s not likely that one of your posts will suddenly be seen by 1 million, or even 100,000 people.

However, I have proven many times in my own social media that posting a visual brain teaser will get far more interaction than most any other type of post.

Using one is also a great way to get a visitor’s attention on your website or in an email. This is another great way to grow your business.

And teasers are so easy and fun to use!

How to Use Brain Teaser Images in the Classroom

Besides reducing boredom, brain teasers can energize your students and improve concentration.

Further, they can boost problem-solving skills, memory, and help kids learn faster (according to Book Widgets).

As an educational tool, puzzles can be used in many different ways. Use them as a way to engage the classroom when kids are sluggish or as an in-between assignment activity. You could also use them during break time for the class or for individual students.

Finally, you can use a puzzle to improve a particular skill or subject. Here’s a great opportunity to use a Mathematical type of brain puzzle.

How do I make picture brain teasers for kids?

If you are making an image for kids, you want to first make sure they’re age-appropriate, colorful, and visually interesting. So, for example, if you love the brain teaser picture with the beer bottles, no worries.

Just replace the beer bottles with any of the other “puzzle objects” that are included with the Brain Teasers Puzzle Templates

Of course, you can also add other graphics to the software (kids love comic images for example).

And easily import your own transparent PNG graphics (objects without a background) into the software. If you’re a teacher or educator, you likely have access to some of these already.

Any of these graphic elements can be easily re-sized to fit your puzzle image.

What Are Some Good Brain Teaser Questions?

There are a ton of good questions you can ask to get a conversation started. But keep in mind what result you’d like to see from your puzzle or riddle.

Do you want students to learn something? Will your social media followers be able to get the answer right? Or are you hoping only one or two people can solve it because you’re giving out a prize?

In general, you want your teaser to be challenging but not impossible. It should be fun, engaging, and solvable!

Here are some good ideas for questions, in addition to what you’ll find in the Viral Puzzle templates. Of course, you can always start with a template and modify it to fit your new question.

What’s full of holes but still holds water? (ANSWER: A sponge)

What words look the same upside down and backward? (ANSWER: SWIMS)

What can you keep but cannot share and once you share it you can’t keep it anymore? (ANSWER: A secret)

Jake’s mother had 4 children in all. The first one was named May. The second and third were called June and July respectively. What was the fourth child’s name? (ANSWER: Jake!)

There was a green house. Inside the green house there was a white house. Inside the white house there was a red house. Inside the red house there were lots of babies. What is it? (ANSWER: A watermelon)


Ready to design your own brain teaser images and answer designs?

Grab the templates (with the free Graphics Creator) software!

Create regular newsletter features to give your readers something to look forward to

https://www.laughingbirdsoftware.com/downloads/youtube-channel-art-templates/

Welcome to The Creatorpreneur Tips Newsletter

Every week, Marc & Lisa will be sending you a super tip that will help you make extra money online. Each and every one of these tips are easy to follow. And if you follow them, you’ll make some extra cash or see more traffic to your sites!

We do! ????


Here’s a great idea for you:
Create a Newsletter for Facebook, Twitter, your list and other social media places

For example:

Freebie Fridays

Tips Tuesdays

Infographic Wednesdays

Special Offer Mondays

These are just examples. Figure out what kind of content your subscribers really respond to well, and then create a regular feature for them to look forward to. Bonus Tip: For an even better response, be sure to build anticipation for the upcoming feature a couple days before it happens. E.G., “Don’t forget to check your inbox Monday, because you’re going to get a special offer that’s never been available before!”

How to Become an Online Graphic Designer without Going to School


As a creative person, you’ve dreamt of being a graphic designer but have never taken the first step. Just the thought of going to school and spending a ton of money and time is enough to squash that dream.

And sitting for months learning Photoshop or Illustrator is something you can only afford to do once you’re making money and somehow, through only a miracle, have the time.

The truth is that going to school or learning a complicated graphics program may not be right for you, or even necessary at all.

So here’s the good news:

You can become an online graphic designer by getting an easy-to-use design tool, watching quick but helpful tutorials, and spending a few minutes practicing what you’ve just learned.

And you can do all this without going to school or spending ridiculous amounts of time and money learning design software.

If you’re ready to start a full-time business using just your desktop or laptop computer or excited to have a part-time designer gig working from home, you can start right now making graphics for online businesses.

Here’s how!

How to Learn Graphic Design on Your Own

There are really only two things you need to be a designer in the online world:

  1. Graphic design software that’s easy and starts you off with design inspiration… yet is powerful and flexible enough to let your creativity take over.
  2. A short course or tutorial series that helps you learn with hands-on action as you go.

Below you’ll find a free graphics software app and a short, 9-part video tutorial series that’ll get you started towards becoming an online designer… in under one hour.

So, what are you waiting for?!

Easy-to-Learn Graphic Design Software

First, grab your free trial of The Graphics Creator software!

Grab your free trial of the online Graphics Creator, cloud based

Just log in with the URL and password we send you and you’re ready to become an online graphic designer… without going to school!

Begin Your Simple Video Tutorials Course and Start Designing

Now that you have the perfect design tool with templates, begin watching your video tutorials “school”. Nahhh, not really.

It’s just a mini-course or series that’ll help you become an online graphic designer. Just follow each video to learn all of the basic features, tips, and tricks of using The Graphics Creator.

You’ll discover how easy it is to create graphics that look like a designer made them, even if you’re not exactly a professional yet. And you can easily pause a video any time to try out what’s being shown. Simple.

Watch the 9-part Mini Design Series:

START HERE!

Learn how to become a graphic designer... just watch these simple tutorials

You’re an Online Graphic Designer… Almost

Now that you’ve watched the nine videos to learn the basics, your focus will be on practicing your new design skills.

Additionally, you can improve your design skills by:

Just think about this… if you were to have gone to a graphic design school instead of watching this video tutorial, you might have only just finished the first chapter or two of your brand new, and expensive, design theory book.

Instead, you’ve just learned actionable design that you can build upon each day. And you can now offer your graphic design services to other businesses who want online images for advertising, social media, products, and content.

More Design Inspiration

I hope you’re excited about what the future holds for you as a graphic designer. From working part-time to making it a full-time career… either way, you’ve discovered a fun and creative way to earn some cash, work at home, and serve others with your design talent.

More resources that’ll make becoming an online graphic designer easy and fun:

  1. Get more templates and graphics, for inspiration and fast, easy design creation.
  2. Join The Creatorpreneurs community on Facebook.
  3. Follow Laughingbird Software’s blog that focuses on creating online graphics for small businesses.
  4. Sit back and watch more videos showing exactly how to design what your paying customers need.

How To Create Your Own Billboard-like Design

Hi there Creators!

In this video, we’re going to learn how to create our own Billboard Design using The Graphics Creator Software.

Graphics like these are great for social media graphics …Facebook ads, or maybe a YouTube banner. You can even use them on your websites as fun promotional graphics!

We’ll be creating our new billboard design with the online version of the Graphics Creator (you can get it here: https://www.webgraphicscreator.com)

The Graphics Creator Software has become the easiest way to create your own designs and social media graphics.

It’s used all over the world for content marketing and visual communication.

(It’s the best Photoshop and Canva pro alternative on the market). And! With all Laughingbird Software products, You’ll have access to our ‘Creatorpreneurs Academy’!

How to Create Animated Video Pins in 5 Easy Steps

You’ve heard about the value of video pins on Pinterest. That’s why you’re here, right? So you know that they get a ton more views than regular pins (Pinterest favors them in their search) and you don’t want to miss out on increasing your clicks and sales.

Just take a look at Laughingbird Software’s video pins and you’ll see the crazy amount of views they can get, some of them almost immediately after pinning.

So, the question is, why haven’t you been using them?

Your excuse is probably the same as most pinners… “I don’t know how to create a video pin”. “It’s just too hard.” Or, “I’m already confused just thinking about it?”

Well, no more excuses. Follow this easy step by step method of creating animated video pin graphics. When you’re done with these 5 steps, you’ll have created and posted your first animated video pin to your Pinterest account… without massive stress or hours of your time!

STEP ONE: Grab an Easy Pinterest Graphics Tool.

Don’t make this harder than it needs to be. You don’t need Photoshop or any other hard-to-learn graphics program. But, you do need an easy yet powerful app that lets you start with professionally-designed templates. And one that produces quality, high-resolution images.

The Graphics Creator is perfect for creating Pinterest pins on a weekly basis like I do (you can also create every other graphic you need for your biz). Grab the Pinterest Templates with Motion Graphics and you’ll get The Graphics Creator software for free.

Once you have the software and templates, watch this video to find out how you’ll be creating an animated video graphic:

https://youtu.be/oz-58ZQQa40

STEP TWO: Choose a Template and Motion Video Background

Here’s what will make video pin creation really fast and easy.

No, you don’t have to write, direct, and edit your own film!

Just pick a professionally created template from The Pinterest Templates with Motion Graphics. They’re already at the Pinterest pin size of 600 X 900 with a 2:3 aspect ratio. However, you can simply change the canvas size on any template to make it bigger as long as you keep the ratio.

You can also make it longer or make it a video pin sized at a 1:2.1 ratio, (although 600 x 900 is the smallest size you’ll want to make with a 2:3 aspect ratio).

Then, use the “elements” button at the top of the canvas to select a motion background. Click and drag it directly onto the design canvas. You can also choose to import your own video (The Graphics Creator will be able to record and save up to a 45-second video).

If you don’t like the first video background, just click it, hit “delete”, and select another one (only one video can be used on the canvas at a time).

STEP THREE: Add an Attention-Grabbing Title

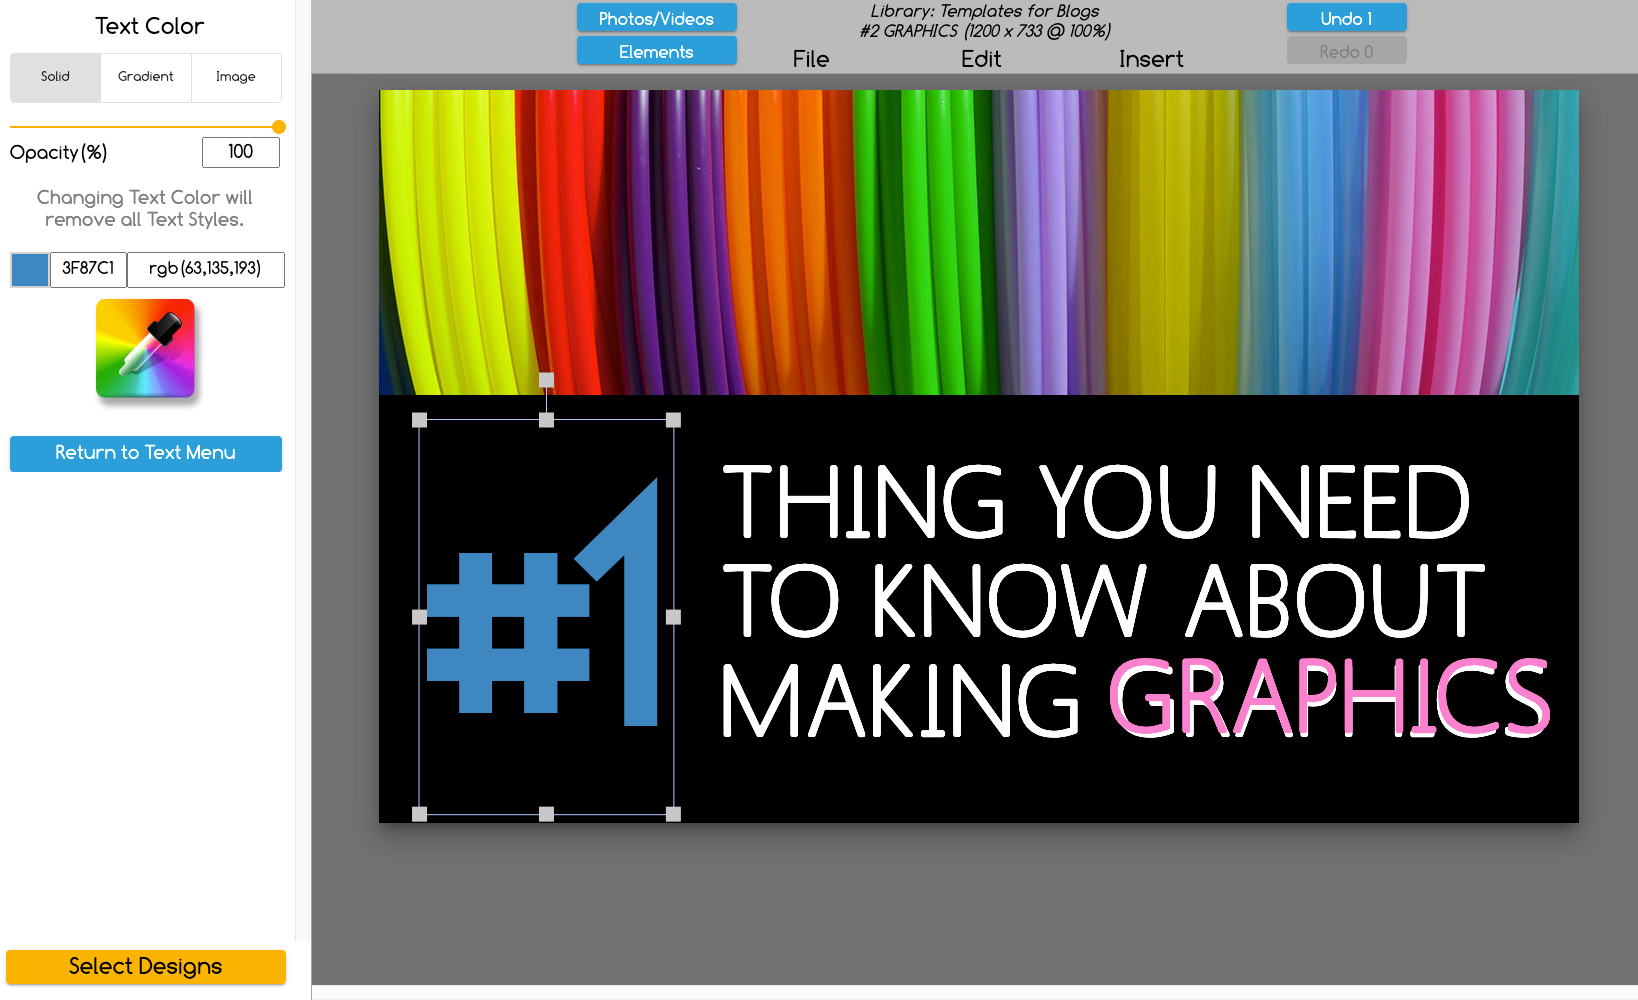
Now, add an easy-to-read, captivating title. Double-click the text that is already in the template and write in your title. Or, you can choose a different font by clicking on “Google fonts” at the top of the canvas.

Make sure to leave space on your template… too many words will appear jumbled and get overlooked, even in an animated video pin. Your goal is to have a clean, readable, and sometimes colorful pin that jumps out at your audience.

STEP FOUR: Save and Download as a Video file

Stay with me! This is way easier than it sounds.

When your pin is ready, you’ll need to save it as a video file. It’s just a couple of extra clicks. Start by selecting “download” from the top pull-down menu. This will save your graphic as a “webm”. Webm will work on Facebook and other social media but not on Pinterest.

No need to worry. Just follow along here…

How to Record Your Video

First, click the video image on the canvas to “highlight” it. Then choose “Video Record”.

How to record a video pin in The Graphics Creator software.
Click the video image on the canvas to “highlight” it. Then choose “Video Record”.

Next, enter your video name, using your keywords. Then move the slider to the desired video length (10-20 seconds is good for an animated video background).

Then hit “Record”.

Write a title and choose the length of your animated video before recording it.
Next, enter your video name (use your keywords!) and video length (12-20 seconds is good for an animated video background). Then hit “Record”.

Once you click “Record”, just wait a few seconds and it’ll automatically download (export).

Now, for Pinterest, you’ll need to make it an “mp4” video file. So, there is one last step. Once you’ve downloaded your pin, you can easily convert it into the correct file format with a free conversion tool.

You may have already watched the video above that shows you exactly how to create and save your motion video. For a reminder on how to convert your video to an mp4, go directly to this timestamp in the video: 04:24

STEP FIVE: Post Your Video Pin Image on Pinterest

Congratulations! You’ve created your first video pin… and now you know how to create more. The great thing about creating your own Pinterest pins is that you can pop in a new background and modify the text slightly to make a brand new pin!

Now it’s time to post your video pin on Pinterest. Since you’ve already been posting pins, it’s just as easy to post a video pin. Once you hit the + sign on your account, just drag your saved video pin from your desktop directly onto the image block.

Now add your title and your detailed description that includes your keywords. Finally, add your URL link to the location you want people who click to go.

For more details on what Pinterest wants from your video pins, read this article.

Get More Traffic with Your Animated Video Pin

Way to go! Just by following these five steps, you’ve created a pin with animated motion that’ll draw more attention to your offer. And that’s just one pin! You can easily make more with your Pinterest Graphics Templates.

And every video pin you add will bring you more traffic… you’ll be able to watch your views go up like I have 🙂

If you just skimmed this article to see how easy it really is to make your own video pin, then go ahead and check out the software and Pinterest Templates with Motion Backgrounds now.

https://www.laughingbirdsoftware.com/downloads/pinterest-templates-with-video-pin-design/
Check them out!

The Creatorpreneurs Academy brings together strategic marketing with eye-catching design so you have the tools and skills to grow your business fast.

HOW TO CREATE MOTION GRAPHICS

Learn how to create some really cool motion graphics with Laughingbird Software. In this video, I’m going to show you how to create MOTION BACKGROUNDS using The Graphics Creator.

Create your own motion graphics with The Graphics Creator by Laughingbird Software (for both Mac and Windows).

https://youtu.be/oz-58ZQQa40

In this Tutorial Tuesday video, you’ll see how to use the ‘integrated’ PEXELS video clips to create really awesome motion backgrounds.

You’ll also see the new CINEMAGRAPH package from Bryan Mullennix of CrackerClips. Cinemagraphs are like moving pictures (think Harry Potter portraits) and they’re perfect for background images.

I also show you a free tool called “Handbrake” that will help you convert your video into an MP4 that looks amazing! Great for uploading your creations to Facebook or Instagram! You can download Handbrake free here: https://www.handbrake.fr

Here are the Handbrake settings I’m using in this video:

Try using these same settings and adjust from there only if you need to!

• Format: MP4
• Align A/V Start

— In the DIMENSIONS tab —
• leave everything as default

— In the FILTERS tab —
• leave everything as default

— In the VIDEO tab —
• Video Encoder: MPEG-4
• Framerate (FPS) 30
• Check “Constant Framerate
• Quality (Constant Quality) 1

* Don’t forget to save your preset!

Also in the video, I mention the new Cinemagraphs pack from Bryan Mullennix! Get the new Cinemagraph Package of videos here:

https://www.laughingbirdsoftware.com/downloads/cinemagraphs-for-professionals/

The Graphics Creator Software has become the easiest way to create your own designs for projects and social media graphics. And, use it for content marketing and visual communication all over the world.

This graphics software is the best Photoshop and Canva Pro alternative on the market!

And, as an added bonus, become a member of Laughingbird Software’s Creatorpreneurs Academy for FREE! Learn how to make money with design and creative marketing strategies – every week!

Drop a comment below and let me know what you think of the tutorial on making your own motion backgrounds. Let me know in the comments below if this helped you create your own motion graphics!