6 Simple Marketing Design Tutorials for Creative Online Marketers

As an online marketer, you likely spend most of your time writing and creating advertising that’ll demand attention from the right audience. The question is… are you spending too much time?

Can you create eye-catching designs in minutes? Do you know which graphics and images you need for marketing?

I know that it’s frustrating spending hours learning Photoshop or Illustrator! This is why I don’t use either one for my marketing. After all, I’m not an artist. But I am an online business owner who needs to be able to design and advertise quickly (and inexpensively!).

So I get that producing marketing materials quickly and easily for your clients or your own small business saves time and reduces stress.

So here are six simple marketing design tutorials that every creative online marketer can follow. Watch each video below for a marketing design tip or idea that’ll help you advertise to the right audience with the best graphics.

How to Create Designs for Marketing Fast

Marketing design doesn’t have to be hard. You don’t need any difficult-to-learn software and you don’t need to be a graphic designer. Every online marketer can easily create graphics for marketing in a matter of minutes.

So, first, open your Graphics Creator software and follow along if you’d like, or grab your free copy of The Graphics Creator. You’ll get the software and a set of templates for free 🙂

Marketers: Get Your Free Graphics Creator Software and Templates Here:

Online Marketers: Click here to grab your free trial of The Graphics Creator software and templates.
CLICK THE IMAGE TO GET FREE DESIGN SOFTWARE AND TEMPLATES FOR MARKETING

6 Simple Marketing Design Tutorials

Now, check out each simple marketing design tutorial below. Discover how to become a more competitive and more creative online marketer by using the best graphics.

1. How to Market to Your Perfect Niche Audience

Learn how to target your unique niche audience and create designs for them.

Watch the video to get some simple ideas on how to market and design on Facebook using The Ad Creator templates (an add-on set for the Graphics Creator).

2. How to Use Marketing Design to Bring in More Website Traffic

Use this simple but effective marketing tip to get more traffic, more clicks, and more sales.

Then learn how to use The Graphics Creator’s Blog Graphics templates to make a featured graphic for your website or blog.

3. How to Create Social Media Designs for Product Launch Marketing

Learn how to make really cool social media ad graphics for your next product launch.

And, find out how to use The Greatest Show templates for some super stand-out marketing graphics!

4. How to Create Fresh Content with New Graphics

Content marketing is not just about what you write. Giving your customers great content also depends on using effective and meaningful graphics in your marketing.

Check out these ideas to create new content from old content. Then watch as Marc shows you how to quickly make a new graphic for your “new” content.

5. How to Advertise with Billboards

Here’s a super simple trick to create a unique advertisement to promote your product or service. Even though you’re an online marketer, you can still use billboards to grab the attention of your audience.

How to use the new “Shapes” feature and “Place Holder” feature in the Graphics Creator to map your graphic directly to a billboard opening.

You can use this technique to create book covers and mockup designs as well.

6. How to Make Money with YouTube and Attention-Grabbing Channel Art

Starting a YouTube channel can be a little scary and overwhelming. Watch the video to get simple ideas for your channel. And pay attention as Marc shows you how to create the perfect YouTube graphics for marketing to your customers.

Make correctly sized banners and thumbnails in minutes! Grab the YouTube Channel Art templates.

Conclusion: Keep Marketing Design Simple

As an online marketer and business owner, you need to create marketing content quickly and efficiently. By watching these simple marketing design tutorials, you’ve taken a big step to saving time, reducing stress, and growing your business.

Would you like to watch more marketing design tutorials to help grow your business? Take a look at Laughingbird Software’s YouTube channel.

Simple marketing design tutorials help online marketers create and publish the designs they need for advertising a small business.
Please Share on Social Media!

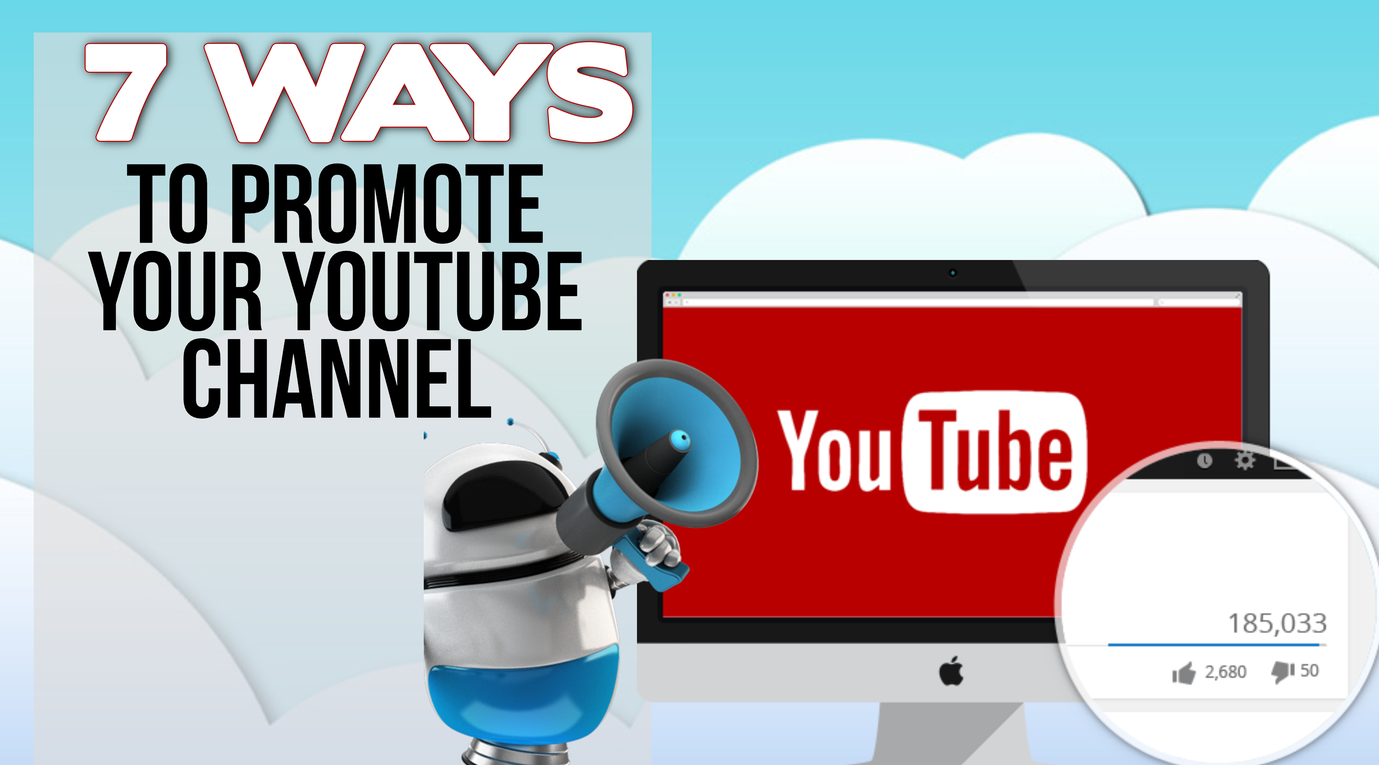
7 Ways To Promote Your YouTube Channel

As an entrepreneur, you know you need to spend more time advertising on YouTube. But knowing where to even start can feel overwhelming. After all, you’ve already been stressed over just making a video.

But the important thing to know is that you can make money and grow your business on YouTube by following these simple ideas:

  • Write Engaging Titles
  • Use the YouTube Channel SEO checklist (below)
  • Promote your videos on Facebook
  • Cross-promote your videos
  • Don’t use titles with more than 50 characters
  • Embed the videos on your company blog
  • Create custom thumbnails for each video posted on YouTube

Although it requires some thought, you can be successful on YouTube. Find out exactly what you need to do to promote your YouTube channel by reading the article below.

Follow These 7 Ways to Promote Your YouTube Channel

You don’t need any experience. Just start with number one and check them off as you go:

1. Write Engaging Titles

The first step toward building an audience is to get people to start watching your videos. If the titles are boring and non-engaging, nobody’s going to click through to watch your videos.

Take a look at the titles for your current videos. Are they enticing enough to get people to click? If the answer is no, look for ways to improve it.

Keep it simple but always make it clear how your audience will benefit by watching a video.


Learn how to promote your YouTube channel with 7 easy tips.
Share on Pinterest!


2. Go Through Your YouTube Channel SEO Checklist

YouTube is the second-largest search engine in the world. Similar to Google, people use it to find solutions to their problems, get more information on a certain subject, or to answer a question.

As a result, organic search is one of the best ways to promote your YouTube channel.

Although there are many ways in which YouTube may rank videos in search, try following some of the best practices for YouTube SEO. These ideas will increase the chance that your video will show up to more of your desired audience:


-Titles and Description

Include targeted keywords in both the title and description. You can use a tool like Keywordtool.io to help you find keyword ideas.

And… use keywords within your video. According to Brian Dean of Backlinko, speaking the target keywords inside your video will let YouTube better understand what your video is about.


-Engagement

Like many other social platforms, YouTube uses “engagement” (likes, comments, views) to help decide where videos rank in their search results.

So, increase activity on your channel by adding channel tags, using a great title, responding to comments, and creating unique background images and thumbnails.

End screens are another way to promote your business on YouTube. Check out this video on how to make an end screen:


Watch the video to learn how to make an end screen to promote your YouTube videos


-Categories

Make sure to define your “categories” to help YouTube get a better understanding of who to show your videos. You won’t get many clicks on a video if people are coming only to find out it’s not what they are interested in.


-Tags

In addition to categories, use as many tags as possible. This will also give YouTube a clearer picture of the content and make advertising your channel much more worthwhile.

3. Promote Your YouTube Videos on Facebook

Use Facebook’s native video uploader to share video content with another audience. Facebook videos may get more engagement than shared YouTube video links.

Always include a “call-to-action” within the Facebook video post. Tell your audience exactly what you want them to do next. For example, “Check out my other videos on YouTube” (and include a link).

Just remember to make your graphic headers for both Facebook and YouTube look consistent.

Save time!!! Watch this video to create a Facebook header that you can then easily turn into a YouTube header banner:


Make a YouTube banner from your Facebook banner in just minutes.

4. Cross-Promote Your Videos

Who better to promote your YouTube channel than yourself? 

Think of ways you can promote some of your videos within your other videos. For instance, reference an older video within a newer one and leave a link to it in your description. Now viewers can easily find your other content.

You can also use “cards” to help people navigate to other videos. These allow you to give more information and a direct link to your product or service.

But, consider waiting until the end of the video to add cards. You won’t want people clicking away from your video that they’re already watching.

5. Keep Your Video Titles Under 50 Characters

This is an easy one! Don’t make your video titles any longer than 50 characters. Any longer and your title will get cut off, decreasing the chances it will get clicked in search.

6. Embed Your YouTube Videos on Your Blog

Help people find all of your video content on YouTube by embedding the videos on your blog or website, as well as other social media channels. This will increase views of your video and may increase your site’s page views.

7. Use A Custom Thumbnail for Each Video on Your Channel

Verified YouTube accounts can take advantage of the custom design thumbnail feature. A good video thumbnail helps you stand out in the “related video” and “suggested video” sections.

Get some tips on designing and quickly make your thumbnails (and YouTube banners) by watching this video:


Watch the video to find out how to Create YouTube Graphics to Promote Your Business


-Thumbnail tips:

Have a resolution of 1280 x 720 (with a minimum width of 640 pixels). Upload in either .JPG, .GIF, .BMP, or .PNG. Keep it under 2MB. Use a 16:9 aspect ratio as it’s the most commonly used in YouTube players and previews.

And your thumbnail should work well on both desktop computers as well as mobile devices.


Want to promote your YouTube Channel with attention-grabbing graphics?

Get The YouTube Channel Art Creator and make banner graphics and thumbnails like this:

You can promote your YouTube channel by creating your own banners, thumbnails and video graphics using The YouTube Channel Art Creator.


Conclusion

So, you may be wondering which of the seven ways discussed above works best to promote your YouTube channel.

The answer is… all of them together!

These ideas are actually pretty easy to implement. Just start with tip one and start working through them now. Once you’ve done it a few times, it’ll be easy to do for every video you publish.


How to Make Cartoon Characters for Advertising Your Business

4

Cartoon characters can be used for advertising your business any time you need a boost in attention and sales. After all, you can’t go wrong in adding a bit of fun or entertainment in your images and website.

Further, using cartoon characters for marketing, or using a personalized character as a mascot for your brand, can help your business build long-term customer relationships

Continue reading to find out why you need marketing characters and how to make a character for your brand, even if you’re not an artist. Then learn how to use your character or mascot with your perfect business audience.


Why Your Business Should Use a Character or Mascot for Advertising

Think back to your childhood and all of the cartoon characters that come to mind. Each one of these characters brings positive emotions and pleasant memories. And you can probably identify what show or product each character is from.

This is because they make you feel good. In addition, characters are engaging, unique, fun, and tell stories… all of things you want your brand to do for your customers.

When a character resonates with a potential customer, you’ll get that person’s attention for a longer period of time, giving you a better chance to build a relationship and eventually make a sale.

Getting this extra time with a potential customer is hard to do with attention spans being so short. And, of course, there’s always a ton of competing images and advertisements. So you need to do anything possible to get extra time with your audience!

How To Make a Cartoon Character Without Any Art Skills

You don’t need to be an artist or pay a professional artist tons of money to use characters for advertising your business.

However, you also don’t want to use stock images or characters that anyone can buy and use. Then your character would no longer be unique to your brand, as many other businesses could be using it as well.

A great solution to this problem, therefore, is to create your own character.

Watch the video below to find out how to make your own character with:

The Character Creator

Now that you know how to make a cartoon character without hiring a designer, take a look at how to use your character or mascot effectively in advertising your business.

How to Use Cartoon Characters to Promote Your Business

There are a few things to keep in mind when using characters to advertise your business.

  1. First, make sure your cartoon advertising character will be viewed positively by your audience. Is your character likable, friendly, smart, and helpful?

    Your character should build a relationship with your audience.

  2. Use your character to teach and entertain your customers, as well as to help them solve their most pressing problem.

  3. Your brand mascot should be everywhere! On business cards, social media posts, ebooks, advertisements, and your website.

    Remember, your character is telling the story of your brand and offering help to your audience. So, the use of your character should be consistent.

    Customers will also learn to automatically recognize your mascot, which will help grow your brand!

  4. Make sure to personalize the character and image for your unique brand and business offering.

    Make sure you find a cute, lively, or funny character that resonates with your post or unique niche. Goofy little monsters might be super cute for selling your child daycare services, but will they resonate with a more mature audience?

  5. Decide on a personality for your character and stick with it. Always keep true to your character’s life story, personality, and behavioral traits.

    Make your character have a similar problem to your customers. Then have your character resolve the problem. That’ll help your audience empathize with the character and create an emotional bond with it.

Use The Character Creator to make your character for advertising your business

Using Cartoon Characters in Marketing Will Grow Your Business

That’s the bottom line!

Take advantage of how cartoon characters can build long-lasting relationships with your customers and help them solve their problems in a fun and entertaining way!

Use your own perfectly created characters to advertise your business, or create the perfect mascot for your audience, to get more attention and bring in more sales.

Blog Graphics Design in Six Easy Steps

2

You’ve probably heard that an article with high-quality blog graphics is read more easily and gets way more social media shares.

Unfortunately, for most bloggers, the problem is that you’re NOT a graphic designer. You don’t have time to learn complicated design techniques or a ton of money to spend on graphic designers.

However, you can learn to design your own blog graphics at a moment’s notice in just minutes.

First, get the FREE Graphics Creator software. Now follow along step by step!

Six Easy Steps to Designing Amazing Graphics for Your Blog, Pinterest, and Social Media.

If you’re a blogger or content creator, you constantly need graphics for your blog and social media. So, you need graphics creation to be easy. And you probably don’t have time or money to hire a designer for each and every graphic.

Have you ever wished you had an in-house designer to make every graphic you need?

I’ll show you how you can become your own in-house graphic designer and create blog and business graphics in minutes, at any time of day.

You might also like to grab the Blog Graphics Templates and Pinterest Templates with Motion Graphics

Follow these 6 quick steps to create your very own blog graphic in under 20 minutes (and once you get the hang of it, which won’t take long, you’ll be whipping out each graphic in just a few minutes).

Design blog graphics in 6 easy steps with The Creator7 social media templates.
Share on Pinterest!

Before beginning, have you gotten The FREE Graphics Creator design software yet?  

Yes, it’s FREE!

Then, be sure to also install the free templates (this will remove the trial watermarks… those pesky squiggly lines).

Now, let’s design your first blog graphic!

Step 1. Begin Creating your Blog Design

Select the free template set from the pull-down menu on top. Then click on a template you want to use.

Create graphics for your blog with these free templates
A few of the “drag & drop” templates you get with The Graphics Creator Free software


Step 2. Size the Software Canvas

This is where you’ll be designing all of your images. You can re-size the canvas to a size needed for your blog, making it bigger, smaller, wider, or taller. 

After selecting your first template, start by clicking on “Format Canvas”. Here you can re-size the canvas (making your overall image bigger or smaller) and change the color of the background.

How to chage the canvas size on The Graphics Creator software

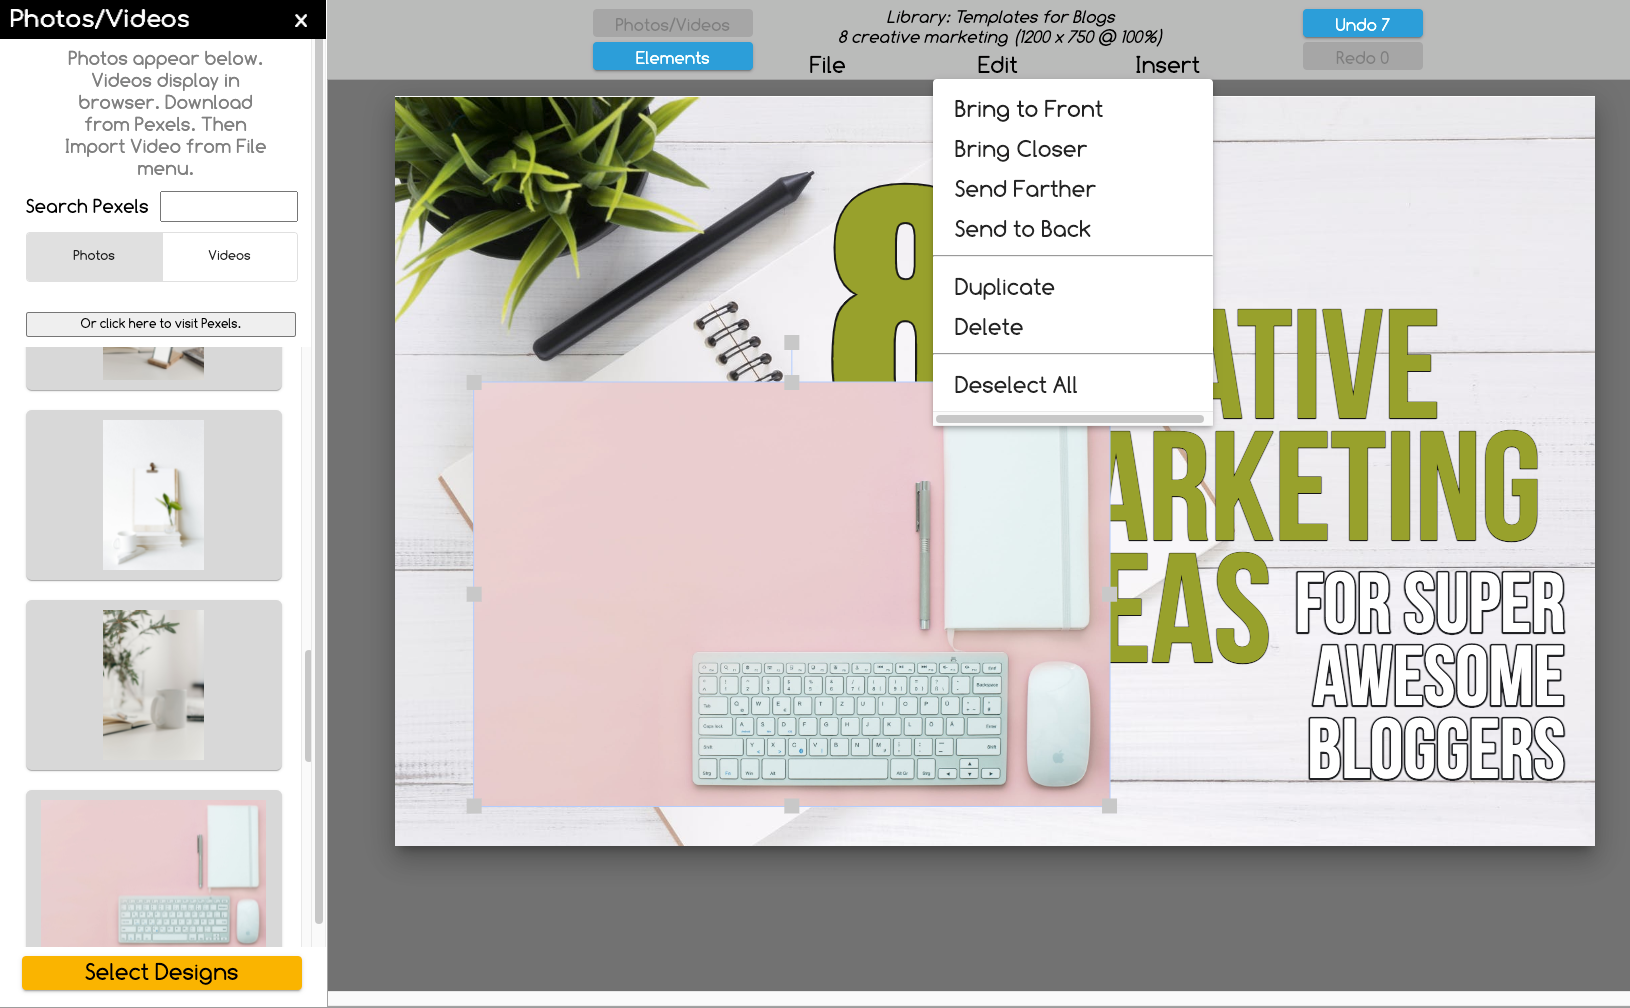
A typical blog graphic header, otherwise known as a “featured graphic”, is a rectangle (canvas size is set at 1200 x 750 in this example template).

However, you may also wish to use a variety of sizes for smaller content graphics throughout your blog article.

Step 3. Choose your Images

Being a serious blogger, you’ll want to make sure your images are relevant to your article and help readers understand what the article is about.  Good images can even be teachable moments.

So, considering the importance of images, there are two images you may wish to modify:

OBJECTS

After selecting your first template, click on an image or object in the template to “highlight” it. Then you’ll see the “Image Menu” on the top left.

You can delete it and choose a new object/s. Or simply re-size it or re-color it.

To re-size objects or text… Click to highlight and use the “grab handles” to resize in all directions.

Choose where to go within the Image Menu. You have several options to choose from. To get a feel for the software, click on different menu choices and play around a bit.

Once you have the perfect object, re-size and modify just like you would any image or object already included in The Graphics Creator.

BACKGROUND IMAGES

What is the purpose of this image in your blog and in your article’s overall design? You might wish to have similar background images to stay consistent with the article’s topic and your brand.

You can change the background image by clicking on and deleting the current image. Then you can search for new images in your “Elements” tab or by searching from your “Photos/Videos” tab. Or you can also import a photo or graphic from your computer.

How to Import a Photo or Graphic for your Blog Design:

Yes, you can import images and resize them to fit your canvas! There are two easy options here.

  1. To import an image from your computer desktop, go to the “File” menu for at the top of your screen and choose “Import Image”. Select your image and you’ll now find it on the canvas!
  2. Use The Graphic Creator’s searchable stock images without ever leaving your blog design.

Take a look:

This is hot to import a stock photo image for your blog into your Graphics Creator

Important Advice: Use an image that’s relevant to your blog so that the search engines and Pinterest have a good understanding of what your article is about. This will help it rank higher in both.


4. Add your Text

Now change the text by clicking on the piece of text you want to change. The menu on the left will change to “Text Menu”. This menu works in the same way as the Image Menu but has more options.

For now, keep it simple. DOUBLE-click to highlight the text and write out what you want. 

To add additional text, select the “Edit” menu and choose “New Text”. Then DOUBLE-click to highlight and change the text. You may also wish to select a new font. 

5. Choose a Different Font and Background Color or Image

This step is optional but recommended… especially if you’re using your final graphic on your blog article or for a Pinterest pin.

Choosing a different font and modifying the background will create a more customized design. And having a unique design will help you rank in both Pinterest’s and Google’s algorithms, thus bringing you more traffic!

It’s easy. Here’s how.

If you want to use a different font, click “Text Format” and select from hundreds of fonts. Make sure you’ve highlighted the text you want to change first.

There are a couple of options here:

  1. PICK A SYSTEM FONT
    or
  2. PICK A GOOGLE FONT

Just click on either option and scroll to choose a font that looks good to you.

How to Pick a new font for your DIY blog graphic design in The Graphics Creator

You can also scroll to choose here but you can also type in a Google font you’re searching for. If you’re looking for a particular type of font, you should click on “Preview Google Fonts”.

Click on “Categories” and you can browse different types of fonts including serif, sans serif, and handwriting.

6. Download your Final Blog Image

Once your design on the canvas is complete, go to the “File” menu and choose “Download Image. Select JPEG or PNG (JPEG is usually good for blog graphics)

After creating one or two images, you won’t need these instructions anymore.

It’s that easy to tackle your own blog graphics design!

Now That You’ve Designed your First Blog Graphic

Congratulations! You’ve created your first blog graphic design.

You can continue to practice with your free templates. Then grab the full set of Blog Graphics Templates.

Grab the Blog Graphics Templates for The Graphics Creator here

And if you’re like most bloggers and wisely spend your time on Pinterest, then take a look at the Pinterest Templates with Motion Graphics … easily make your own attention-grabbing Video Pins!

Pinterest Pins With Motion Backgrounds

Want more DIY design inspiration or ideas on how to use The Graphics Creator by Laughingbird Software? Check out all of our articles and video tutorials in our Creatorpreneurs Academy 🙂

The Creatorpreneurs Academy brings together strategic marketing with eye-catching design so you have the tools and skills to grow your business fast.

How To Create Your Own Billboard-like Design

Hi there Creators!

In this video, we’re going to learn how to create our own Billboard Design using The Graphics Creator Software.

Graphics like these are great for social media graphics …Facebook ads, or maybe a YouTube banner. You can even use them on your websites as fun promotional graphics!

We’ll be creating our new billboard design with the online version of the Graphics Creator (you can get it here:
https://graphicscreator.laughingbirdsoftware.com/)

The Graphics Creator Software has become the easiest way to create your own designs and social media graphics.

It’s used all over the world for content marketing and visual communication.

(It’s the best Photoshop and Canva pro alternative on the market). And! With all Laughingbird Software products, You’ll have access to our ‘Creatorpreneurs Academy’!

How to Create Animated Video Pins in 5 Easy Steps

You’ve heard about the value of video pins on Pinterest. That’s why you’re here, right? So you know that they get a ton more views than regular pins (Pinterest favors them in their search) and you don’t want to miss out on increasing your clicks and sales.

Just take a look at Laughingbird Software’s video pins and you’ll see the crazy amount of views they can get, some of them almost immediately after pinning.

So, the question is, why haven’t you been using them?

Your excuse is probably the same as most pinners… “I don’t know how to create a video pin”. “It’s just too hard.” Or, “I’m already confused just thinking about it?”

Well, no more excuses. Follow this easy step by step method of creating animated video pin graphics. When you’re done with these 5 steps, you’ll have created and posted your first animated video pin to your Pinterest account… without massive stress or hours of your time!

STEP ONE: Grab an Easy Pinterest Graphics Tool.

Don’t make this harder than it needs to be. You don’t need Photoshop or any other hard-to-learn graphics program. But, you do need an easy yet powerful app that lets you start with professionally-designed templates. And one that produces quality, high-resolution images.

The Graphics Creator is perfect for creating Pinterest pins on a weekly basis like I do (you can also create every other graphic you need for your biz). Grab the Pinterest Templates with Motion Graphics and you’ll get The Graphics Creator software for free.

Once you have the software and templates, watch this video to find out how you’ll be creating an animated video graphic:

STEP TWO: Choose a Template and Motion Video Background

Here’s what will make video pin creation really fast and easy.

No, you don’t have to write, direct, and edit your own film!

Just pick a professionally created template from The Pinterest Templates with Motion Graphics. They’re already at the Pinterest pin size of 600 X 900 with a 2:3 aspect ratio. However, you can simply change the canvas size on any template to make it bigger as long as you keep the ratio.

You can also make it longer or make it a video pin sized at a 1:2.1 ratio, (although 600 x 900 is the smallest size you’ll want to make with a 2:3 aspect ratio).

Then, use the “elements” button at the top of the canvas to select a motion background. Click and drag it directly onto the design canvas. You can also choose to import your own video (The Graphics Creator will be able to record and save up to a 45-second video).

If you don’t like the first video background, just click it, hit “delete”, and select another one (only one video can be used on the canvas at a time).

STEP THREE: Add an Attention-Grabbing Title

Now, add an easy-to-read, captivating title. Double-click the text that is already in the template and write in your title. Or, you can choose a different font by clicking on “Google fonts” at the top of the canvas.

Make sure to leave space on your template… too many words will appear jumbled and get overlooked, even in an animated video pin. Your goal is to have a clean, readable, and sometimes colorful pin that jumps out at your audience.

STEP FOUR: Save and Download as a Video file

Stay with me! This is way easier than it sounds.

When your pin is ready, you’ll need to save it as a video file. It’s just a couple of extra clicks. Start by selecting “download” from the top pull-down menu. This will save your graphic as a “webm”. Webm will work on Facebook and other social media but not on Pinterest.

No need to worry. Just follow along here…

How to Record Your Video

First, click the video image on the canvas to “highlight” it. Then choose “Video Record”.

How to record a video pin in The Graphics Creator software.
Click the video image on the canvas to “highlight” it. Then choose “Video Record”.

Next, enter your video name, using your keywords. Then move the slider to the desired video length (10-20 seconds is good for an animated video background).

Then hit “Record”.

Write a title and choose the length of your animated video before recording it.
Next, enter your video name (use your keywords!) and video length (12-20 seconds is good for an animated video background). Then hit “Record”.

Once you click “Record”, just wait a few seconds and it’ll automatically download (export).

Now, for Pinterest, you’ll need to make it an “mp4” video file. So, there is one last step. Once you’ve downloaded your pin, you can easily convert it into the correct file format with a free conversion tool.

You may have already watched the video above that shows you exactly how to create and save your motion video. For a reminder on how to convert your video to an mp4, go directly to this timestamp in the video: 04:24

STEP FIVE: Post Your Video Pin Image on Pinterest

Congratulations! You’ve created your first video pin… and now you know how to create more. The great thing about creating your own Pinterest pins is that you can pop in a new background and modify the text slightly to make a brand new pin!

Now it’s time to post your video pin on Pinterest. Since you’ve already been posting pins, it’s just as easy to post a video pin. Once you hit the + sign on your account, just drag your saved video pin from your desktop directly onto the image block.

Now add your title and your detailed description that includes your keywords. Finally, add your URL link to the location you want people who click to go.

For more details on what Pinterest wants from your video pins, read this article.

Get More Traffic with Your Animated Video Pin

Way to go! Just by following these five steps, you’ve created a pin with animated motion that’ll draw more attention to your offer. And that’s just one pin! You can easily make more with your Pinterest Graphics Templates.

And every video pin you add will bring you more traffic… you’ll be able to watch your views go up like I have 🙂

If you just skimmed this article to see how easy it really is to make your own video pin, then go ahead and check out the software and Pinterest Templates with Motion Backgrounds now.

Check them out!

The Creatorpreneurs Academy brings together strategic marketing with eye-catching design so you have the tools and skills to grow your business fast.

Create Your Own eBook Cover Today

0

Don’t just be an ENTREPRENEUR – Become a CREATORPRENEUR!

Create your own ebook cover today, right now with The Graphics Creator:
https://stagingapril.laughingbirdsoftware.com

The eCover Creator module in the software lets you create your own ebook cover art and then MAP IT onto a 3D image like a software box or magazine image

Then, you can use the graphic to create optin forms, or product displays. ALL inside the graphics creator tool! Tons of mockup graphics (or design your own!)

You don’t need Canva, and you don’t need Photoshop to make your own eCovers.

How to make a Facebook AND YouTube Graphic in under two minutes

0

Hi Creatorpreneurs!

Lisa and I were creating a new Facebook graphic (for the new Facebook layout) the other day. And as we worked at it, I thought this would make a great tutorial for you.

In this video, I’ll show you how to create TWO awesome images in just minutes using The Graphics Creator Software

The Graphics Creator has become the easiest way to create your own designs and social media graphics. It’s used all over the world for content marketing and visual communication.

(It’s the best Photoshop and Canva pro alternative on the market). And! With all Laughingbird Software products, You’ll have access to our ‘Creatorpreneurs Academy’!

Learn smart money tactics and creative marketing strategies – every week!

The Best Software for Creating Your Own Desktop Wallpaper

In this video, I’m going to show you how easy it is to create your own desktop wallpaper using The Graphics Creator.

… even for non-designers.

HOW TO CREATE MOTION GRAPHICS

0

Learn how to create some really cool motion graphics with Laughingbird Software In this video, I’m going to show you how to create MOTION BACKGROUNDS using The Graphics Creator.

Create your own motion graphics with The Graphics Creator by Laughingbird Software (for both Mac and Windows).

In this Tutorial Tuesday video, you’ll see how to use the ‘integrated’ PEXELS videos to create really awesome motion backgrounds.

You’ll also see the new CINEMAGRAPH package from Bryan Mullennix of CrackerClips.

I also show you a free tool called “Handbrake” that will help you convert your video into an MP4 that looks amazing! Great for uploading your creations to Facebook or Instagram You can download Handbrake free here: https://www.handbrake.fr

The settings I am using in this video:

• Format: MP4
• Align A/V Start

— In the DIMENSIONS tab —
• leave everything as default

— In the FILTERS tab —
• leave everything as default

— In the VIDEO tab —
• Video Encoder: MPEG-4
• Framerate (FPS) 30
• Check “Constant Framerate
• Quality (Constant Quality) 1

* Don’t forget to save your preset!

Also in the video, I mention the new Cinemagraphs pack from Bryan Mullennix! get the new Cinemagraph Package of videos here:

The Graphics Creator Software has become the easiest way to create your own designs and social media graphics . It’s used all over the world for content marketing and visual communication.

(It’s the best Photoshop and Canva pro alternative on the market). And! With all Laughingbird Software products, You’ll have access to our ‘Creatorpreneurs Academy’! Learn smart money tactics and creative marketing strategies – every week!

Drop a comment below and let me know what you think of the tutorial on making your own motion backgrounds Let me know if the comments below if this helped you create your own motion graphics!