HOW TO CREATE PINTEREST PINS: DIY in Minutes

If the stress of needing new beautiful Pinterest Pins for your target audience is getting to you, then it’s time to make some changes. It’s no fun having to constantly pay others to create pins for you or to feel overwhelmed by making your own.

I’ll show you how to easily make stunning Pinterest pins in just minutes all by yourself, even if you don’t have ANY design experience.

To help you quickly create amazing pins and fresh content each week, I’ll walk you through answering the questions that’ll make it easy and fast!

  • Why Do I Need New Pins on Pinterest (and LOTS of them?)
  • What is the Best Size for My Pinterest Pins?
  • What Images Should I Use when I Create a Pin?
  • How Can I Brand a Pinterest Pin?
  • How Do I Make Pin Images That Get Shown in Pinterest Search?
  • How Can I Create Multiple Pins at Once?
  • What Should I Write in My Pin Descriptions?

Follow along below and you’ll get answers to each of these questions and discover exactly how to make amazing pins for Pinterest in just minutes.

How To Make Pinterest Pins – and lots of them

First, let’s make sure you have a pinterest account (you can also create a Pinterest business account).
Create your Pinterest profile, then continue with these steps.

You can do that here. experts have said repeatedly that you need to create a pin with new visual content regularly. This is because Pinterest keeps users on the platform by showing them fresh content (aka: new pins).

Therefore, it’s not surprising that they’re going to show the new and best pins in the search feed much more often than older pins.

Sharing new content on Social Media doesn’t mean that you have to write blog posts daily however. It just that you need to create new ways of bringing attention to your content. And designing and publishing a LOT of pins is the way to do that!

What Is The Best Size for My Pinterest Pin?

The main question everybody asks when they’re looking for information on how to make Pinterest pins is: What size are the images?

Pinterest states that the “aspect ratio” (the ratio of width to height) should either be 2:3 or 1:2.1. However, 2:3 seems to be optimal, and this is what you’ll see most often for a Pinterest Pin.

Essentially, it’s a vertical pin that fits nicely on the screen of a mobile phone. For the last few years, pins that were tall images of 600 X 900 pixels were recommended. However, recently Pinterest is suggesting 1000 X 1500 pixels to make sure you get the best image quality.

So, here’s what I suggest… when you create a pin, don’t use anything smaller than 600 X 900 and don’t use anything bigger than 1200 X 1800, especially if you’re going to include pin images on your site (because they may make your site load more slowly, which can frustrate visitors and decrease search rankings).

And no matter what, Create the pins at a 2:3 ratio. Otherwise, your tall images could actually get cut off in the Pinterest feed.

For another blog post, I created a pin that can be used to share an article. This is great for sharing content on social media and other blogs as well! In also contains a call to action.


Create stunning Pinterest Pins here

What Images Should I Use to Create My Pins?

This is a very important question and there are two major things to consider here:

  1. Is my image unique?
  2. Do I have permission to use this photo or graphic on my favorite sites?

Pinterest doesn’t want pinners to make a Pinterest pin that look like everybody elses. They want users to search a topic and be presented with lots of different pins.

So, you need to make your pins with unique images.

Using free images from the internet can be risky. If you use these, people won’t think your pin is that unique because many other pins have used them too! But the good news for you is that there are still some good options.

You can get the free stock photos and simply enlarge them to use only a fraction of the photo. This’ll give the images a different perspective that won’t look the same as others.

There are a number of different ways you can use Pinterest to grow your business. The easiest is by using an engaging background image. I don’t mean a boring, plain colored background. For the background of this pin, I wanted to use a subtle pattern and image that complements the text.

This is an example of a Pinterest pin designed using a subtle but unique graphic background instead of a stock photo

Or this…

Example of a pin using colored graphics instead of photos

Or you can create pins that really stand out among the rest with incredibly unique motion backgrounds. Publishing video pins on Pinterest will get you more views and engagement than standard pins because Pinterest prioritizes them in the pin feed.

And you don’t have to spend hours producing a video… instead, you can just drop a motion background on your pin image.

To find out more about creating the perfect motion video pin… go here.

You can also add graphics to your stock photos, use your own photos, or just use a variety of graphics without a photo.

Finally, don’t forget to make sure you have permission to use the stock image or graphic on your pin (or on your blog post or website).

Wherever you search for images, make sure to read the license agreements to see what you’re allowed to do with those images. And if you’re really set on a certain type of image, you’ll be way better off spending a few dollars on it than paying a fine for using it illegally.

How Can I Brand My Pinterest Pin?

You want to make eye catching pins that viewers recognize and remember. You’ve already spent a great deal of time building your business and its brand. Here are two things you can do to ensure that your Pinterest marketing is consistent and attractive to your viewers:

  1. Every time you create a new pin, make sure to put your logo or brand markings on it.
  2. Consider using your brand’s colors and look and feel on each of your pins (however this is optional… see below).

When putting your logo on your pin, you’ll want it to be fairly small. For the best experience, It shouldn’t take over the pin, but it should make your pin easily recognizable as your own.

Here’s an example I’ve used in my own Pinterest marketing campaigns…
Try adding your business’ website to image. It’s a good way to have potential customers visit your site and learn more about you.

Example of including logo on Pinterest pin
Example of a pin adding the business logo

The exception to this is when you want to use your logo as the main image to make your pin on Pinterest brand front and center. However, it would be smart to use your logo as the main image only once or twice. Otherwise, Pinterest may not see each pin as a new design.

Also, avoid placing your logo or brand marking in the lower right hand corner due to Pinterest’s own tool icons.

Now you might want to design your custom pins to look similar (not the same) to each other. This is another way to get your brand recognized.

However, because a Pinterest pin is published individually and ends up being spread out over thousands of searches, Pins are not always going to be seen side by side. And most users on social media aren’t going to go look at your Pinterest board to see if your pins match.

Therefore, it’s totally reasonable to create new pins with many different colors, images, and designs to see what gets the most engagement from your Pinterest viewers. After all, this is what we want more than anything!

You can see that I make pins on my Pinterest board with different images and colors. I do this because I want my pins to stand out among all of the pins that tend to look the same. Here are some Pinterest Pin templates you can modify with the software like I did:

For the best experience, don’t be afraid to use bright colors for your Pinterest images. There is absolutely no reason to make your pins look like so many others… with faded, muted colors and a flowing script font (that’s hard to read by the way).

How Do I Make Pin Images That Get Shown in Pinterest Search? And Fast?!

Power Tips: Unique images will get shown in the Pinterest feed more often. That’s the bottom line. However, there are some basics rules to follow:

  1. Your images should relate to your topic.
  2. You should only use text on the image that relates to your topic (don’t use images with random words somewhere in the image)
  3. The text on your image should include 1 or 2 of your main keywords.
  4. Make sure to name your pin’s image using keywords when you save it.
  5. Be inspirational, helpful, and clear about what you’re offering!

How to Design Your Images

So how do you create high quality images, unique Pinterest pins in just minutes?

This is an easy DIY task when you have modifiable and reusable templates at your fingertips. You can create pins and publish them fast.

And you won’t have to try to explain what you want to anyone else or wait several days for your fresh pins!

Some of the Pinterest templates you'll find in The Graphics Creator software
20 of the 50 templates included in The Graphics Creator Pinterest Templates.

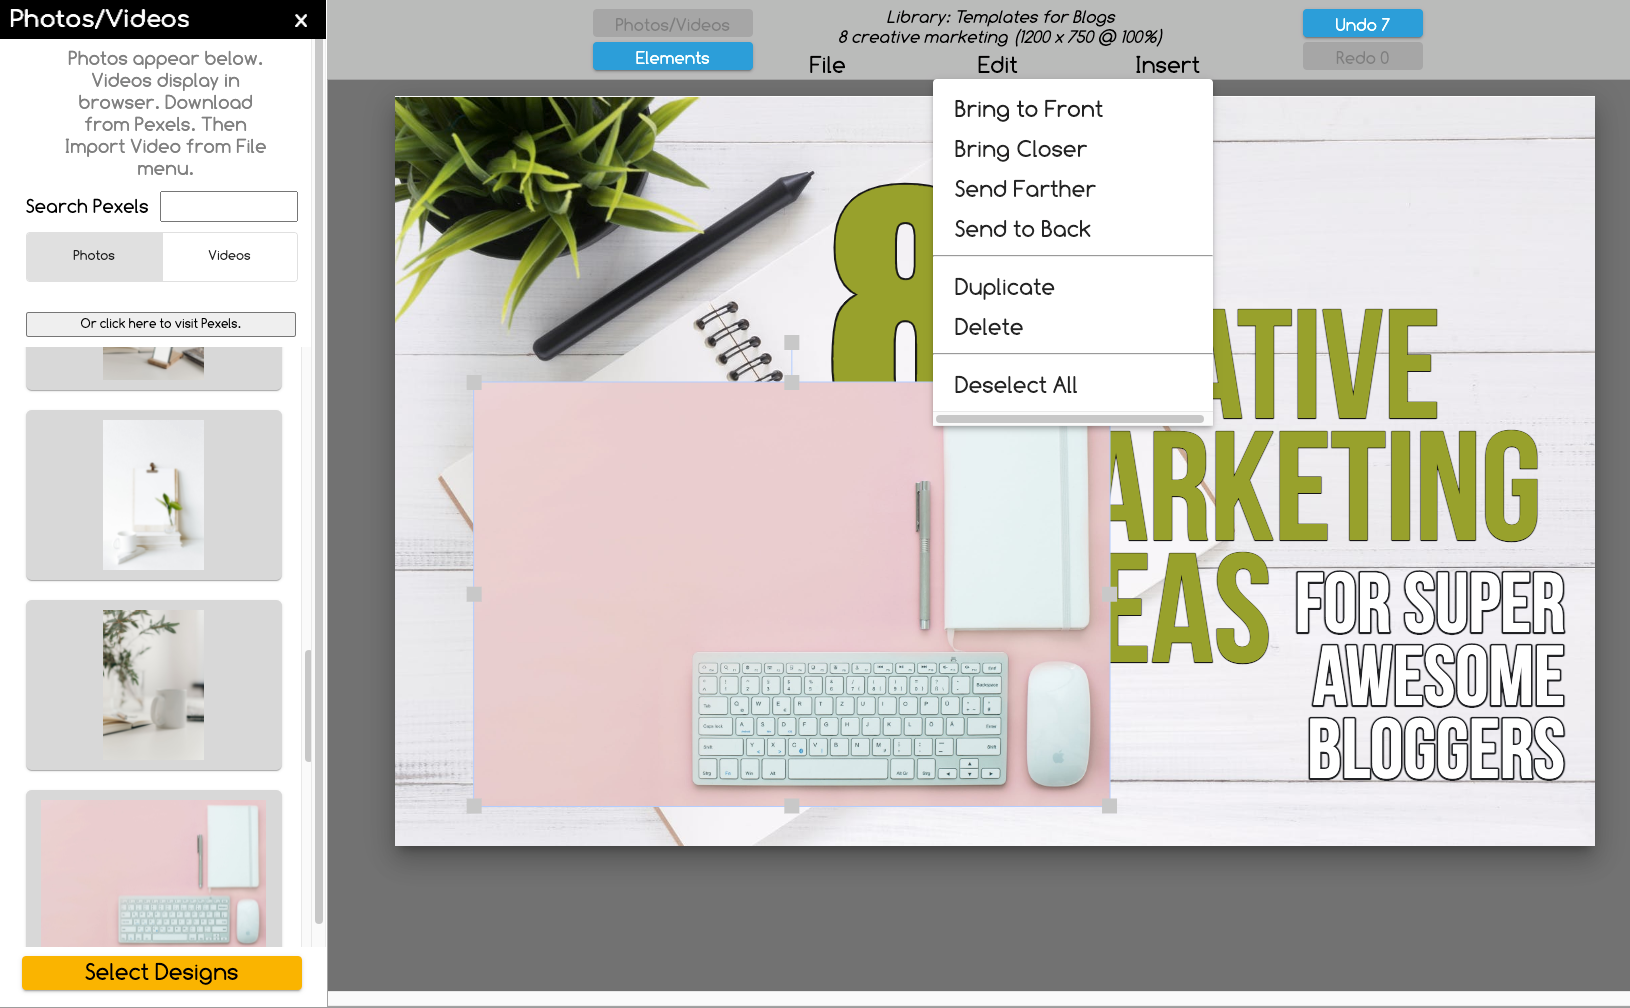
Simply select a Pinterest template from The Graphics Creator (or login to the Online Graphics Creator). You can use any of the built in stock photos, upload images from your desktop computer … or use your own images.

Then decide what you need to change to make a personalized pin for your topic:

  1. You’ll definitely need to re-write the text.
  2. You might also want to change the background or the text’s font.
  3. Choose the perfect text and graphics colors to match your background image.
  4. Add your logo (your logo should’ve been saved as a transparent PNG)

You can easily learn to create your own graphics, including Pinterest images, by watching The Graphics Creator’s brief Getting Started tutorials.

You can easily modify a template by changing text and images.
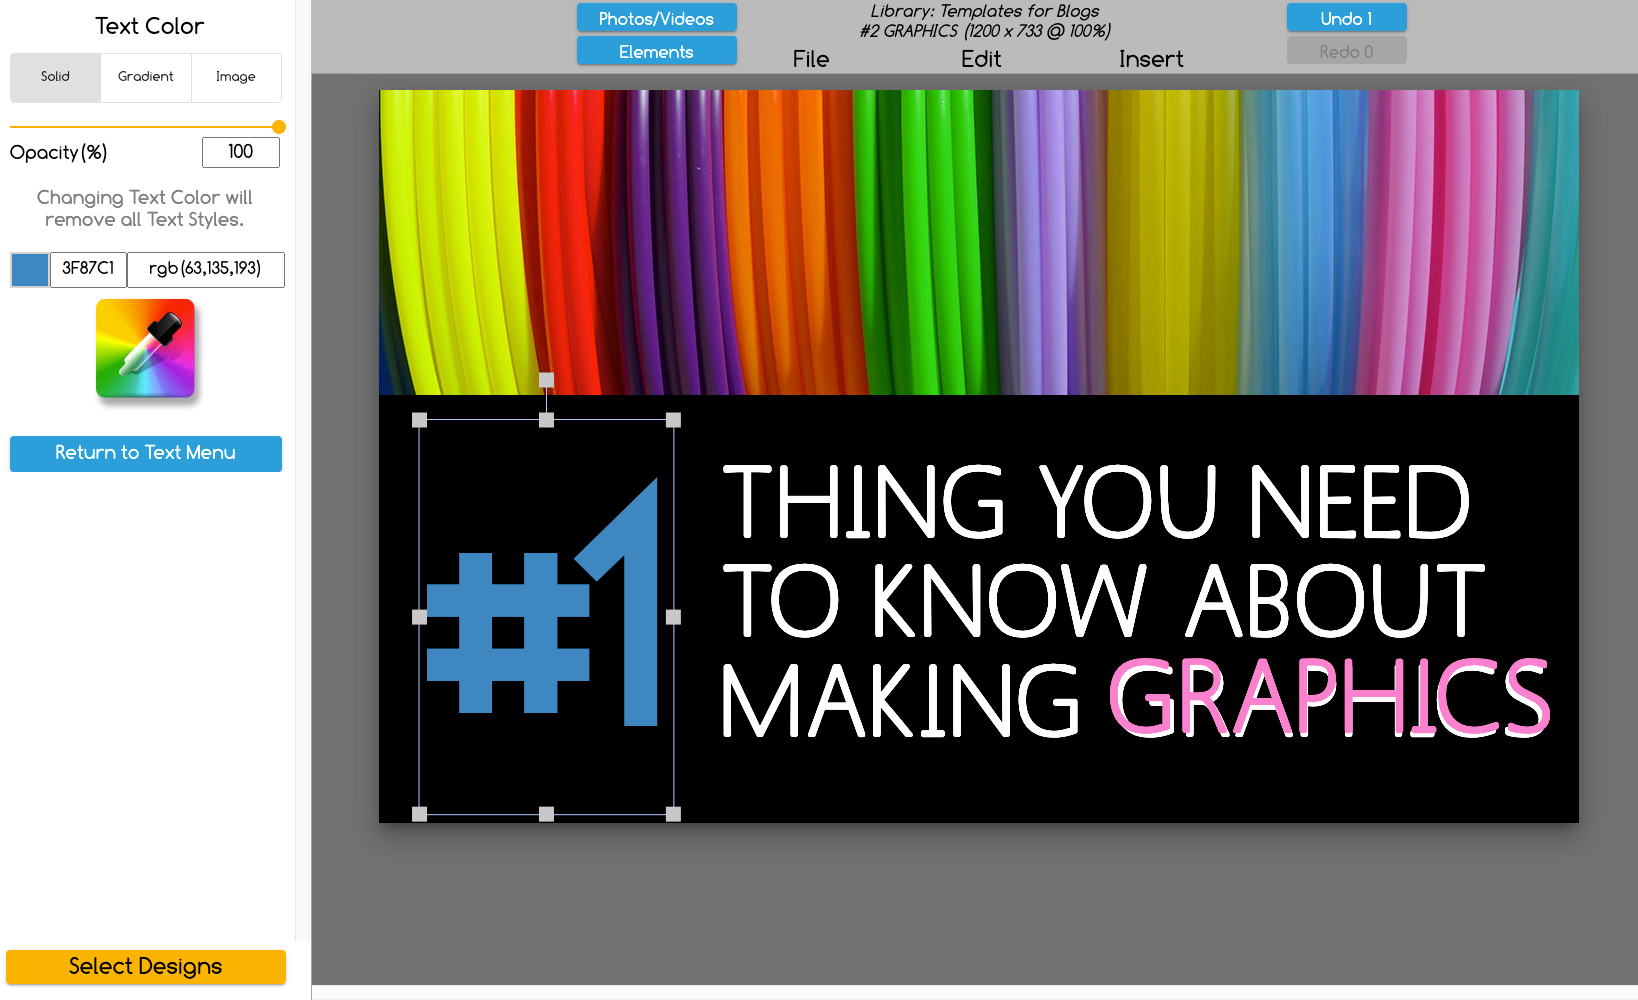
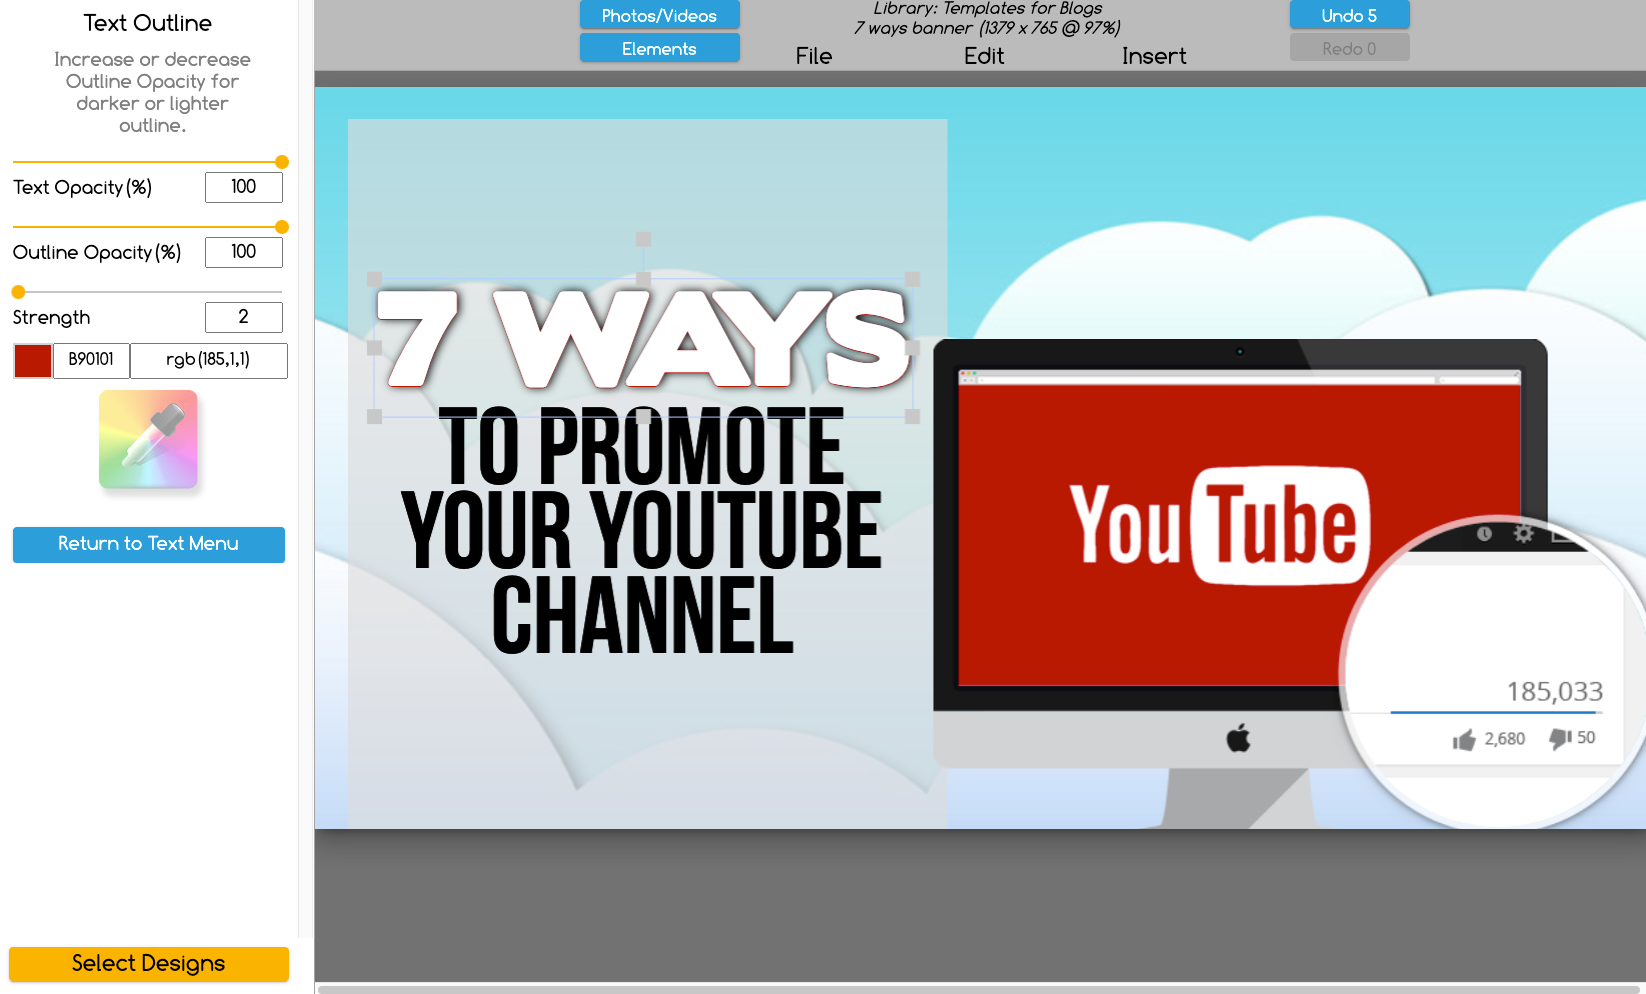
Graphics Creator software canvas: Change the text color, fonts, background images, colors, and design elements.

What To Write on Your Pins

You can’t learn how to make stunning Pinterest pins in minutes without knowing what to write:

  1. When you create a Pin, make sure to always include 1-2 keywords or your main keyword phrase.
  2. Write a Call-to-Action (if appropriate)

You might simply add the pin title of your article, which would already include your keywords (I hope!).

However, it’s more important that you use keywords found directly from Pinterest. These are the keywords people are searching for on Pinterest… and they might be different from what you’d find people searching for on Google.

when you use pinterest to search for Pinterest keywords, just type in phrases you think searchers might be looking for on your topic. If those words or phrases come up automatically, you’ve found a keyword that people are searching for.

Then, consider adding a call-to-action in your Pin design, if it fits and you want viewers to take an action other than just to read your article. Tell people what you want them to do. Make an offer to give out something of value or tell them to sign up for your course.

But don’t overcrowd your pin’s image with text. It’ll make it harder to read and your important keywords might not stand out.

If you don’t have a call-to-action on your pin, make sure you have one on your website!

How Can I Create Multiple Pins at Once?

Creating multiple pins at once is easy. You can include your destination link and point it to your destination website inside each description. This is often called “batching.” Batching your pins saves you time and a ton of money when you’re making your own pin designs.

So, once you have created your first pin, simply save it. In The Graphics Creator, you’ll use “Save As” and give this second pin a new name.

Now, if this pin is for the same article, change the background image or graphics slightly to make it unique (new colors maybe?). Also, change up the text a bit. Perhaps add in a different keyword. And, finally, try out a different call-to-action.

The original pin is a one-of-a kind work of art. Each of the fresh pins created from the original, however, needs to be seen as its own unique creation.

What Should I Write in My Pin Description?

Now that you have made all those stunning pins and are ready to publish them, you want to make certain that Pinterest, and your viewers, know what your pin is all about.

Write a long pin description using your keywords and keyword phrases that point to your destination link. Basically, just tell everyone what your pin is about in causal language (like you’re telling a friend).

Add your brand name and a call-to-action, especially if you didn’t include it on your pin image. Tell viewers what you want them to do when they get to your site.

Make your offer sound exciting or inspirational, including as many details as possible. You’ve got up to 500 characters which should be plenty to write a detailed pin description.

Now go out there and start creating

Creating your own pins is an easy and fun way to bring in more traffic. Our future blog posts will walk you through everything from how to find content that others are pinning to tips on what makes good pinterest photos so popular with followers.

We hope this blog post has been helpful in understanding some of the basics of making your first set of pins. Happy Pinning!

For more information on creating graphics for Social Media, you might like:
https://www.laughingbirdsoftware.com/how-to-make-social-media-design-six-easy-ideas/


these Pins were created with The Online Graphics Creator pinterest app!

Create stunning Pinterest Pins here

Learn how to create your own pins for Pinterest. DIY design in just minutes. And make a video pin by adding a motion background. Grab your templates here and get started!
HELP OTHERS… SHARE THIS PIN ON PINTEREST!

Create Your Own Ads, Then HIRE a Social Media Manager To Promote them

In this video, I’m going to show you how EASY it is to create your own Ads, then Hire a Social Media Manager (for pretty cheap!) to show those ads around the InterTubes for you. ?

You don’t have to know anything about Facebook Ads – you just have to know how to HIRE somebody who does!

Download the software I mention in the video (The People Pack) here: https://www.laughingbirdsoftware.com/downloads/people-templates/

Follow along with the video and create the ad. Then, watch how I’ve hired people to do what I can’t ?

The Graphics Creator Software has become the easiest way to create your own designs and social media graphics .

It’s used all over the world for content marketing and visual communication.

(It’s the best Photoshop and Canva pro alternative on the market). And! With all Laughingbird Software products, You’ll have access to our ‘Creatorpreneurs Academy’! Learn smart money tactics and creative marketing strategies – every week!

Follow Laughingbird Software on Pinterest

Take a look at Laughingbird Software’s Pinterest account. Follow us to get creative ideas on pin design. Plus learn social media, marketing, and design tips to help your small business grow.

Laughingbird Software's pins created for Pinterest

Follow us on Pinterest!

Share our pins with others and get more engagement in your own Pinterest account. Then take a look at how Laughingbird Software’s pin designs get clicks and shares. And pay close attention to our motion graphics pins… you’ll see how they get wayyy more views than other pins.

We can help you create motion graphics pins with The Graphics Creator’s Motion Graphics templates. Just pick a template, re-size to 600 X 900 if needed, and modify the text and image. Done! Plus, save each pin to modify later, making it even easier to create more pins in just a few minutes.

Design templates that let you create motion backgrounds in your Pinterest pin images
Get the Motion Graphics templates with The Graphics Creator software. Click the image.

Follow Laughingbird Software on Twitter!

Did you know we had a Twitter page? Hop over and follow us. We upload a new video each week! Don’t miss the next one. ?


https://twitter.com/LBsoftware/status/1280534999419281408?s=20

Create Your Own Social Media Graphics – with The Graphics Creator

Creating your own Social Media Graphics is super easy with The Graphics Creator software!

In this video, I’m going to show you how to download the free trial version (it does contain watermarks over the images) and how you can use the free templates inside the software to create your own logos, business cards (that you can have printed and sent right to your door),

…you can create YouTube Channel Art like banners and YouTube thumbnails AND, I’ll show you how to create animated Ads that you can put up onto your social media channels. All graphics I mention above can be created in under 15 minutes.

Use this coupon code (I point to it in the video): https://www.laughingbirdsoftware.com/images/Coupon-Code-for-YouTube-Video.zip

The Graphics Creator Software has become the easiest way to create your own designs and social media graphics . It’s used all over the world for content marketing and visual communication.

(It’s the best Canva pro and Photoshop alternative on the market).

And! With all Laughingbird Software products, You’ll have access to our ‘Creatorpreneurs Academy’! Learn smart money tactics and creative marketing strategies – every week!

Start creating social media graphics – logos, business cards and YouTube Channel art today! # create social media graphics


Creating your own Social Media Graphics is super easy with The Graphics Creator software!

In this video, I’m going to show you how to download the free trial version (it does contain watermarks over the images) and how you can use the free templates inside the software to create your own logos, business cards (that you can have printed and sent right to your door),


…you can create YouTube Channel Art like banners and YouTube thumbnails AND, I’ll show you how to create animated Ads that you can put up onto your social media channels. All graphics I mention above can be created in under 15 minutes.

Use this coupon code (I point to it in the video): https://www.laughingbirdsoftware.com/images/Coupon-Code-for-YouTube-Video.zip

The Graphics Creator Software has become the easiest way to create your own designs and social media graphics . It’s used all over the world for content marketing and visual communication.

(It’s the best Canva pro and Photoshop alternative on the market).

And! With all Laughingbird Software products, You’ll have access to our ‘Creatorpreneurs Academy’! Learn smart money tactics and creative marketing strategies – every week!

Start creating social media graphics – logos, business cards and YouTube Channel art today! # create social media graphics


Creating your graphics for SOCIAL MEDIA MARKETING


Hi there Creatorpreneurs! today I wanted to show you a little Social Media Marketing trick. I’m going to use the “Greatest Show” template set to get it done.

Watch the video here:

You can create all of your social media designs with this template set:

Greatest Show Templates

The Greatest Show designs are my favorite and they work great when you’re launching a product or have a new product you want people to notice. Don’t just be an ENTREPRENEUR – Become a CREATORPRENEUR! With Laughingbird Software, you’ll learn how to grow your business and make money using graphics you create yourself!

If you learn a little something about social media marketing from this video, let me know what you think in the comments below!


Create Your Own Graphics – 3 New Features for The Graphics Creator

Get your own Graphics Creator: https://www.laughingbirdsoftware.com/the-graphics-creator-8/

Here are three new features I show you in the video above:

– Remove a white background from a Jpeg image
– Create your own “image in text” effects
– and now, create ‘block-text’ (watch the video, you’ll see what I mean)
Comment below and let me know what you think of the updates!

– Marc —————————— Watch the NEW tutorial: “How to create a reflection effect with Laughingbird Software” https://www.youtube.com/watch?v=g1j1PAIryGc ——————————

Cinemagraphs: Capture Attention with Moving Images and Photos

https://youtu.be/Fk5qVTv6Ubg

Wish You Had a “Magical” Way to Grab a Viewer’s Attention?

You can make any advertisement or project come alive by using a professionally shot moving image from a cinemagraph pro… the big brands are using them and now you can too (but at a fraction of the cost!).

…Think “Harry Potter” photographs, optical illusions, or seemingly endless looping video.

They’re basically a really cool way to capture attention with moving images!

Watch this video to see how cinemagraphs will help you and your business capture attention:

What Are Cinemagraphs?

Cinemagraphs are a perfect combination of a still photograph and a video. They can make things feel like they’re moving faster, slower, or are totally frozen.

Additionally, one of the really cool things about a cinemagraph is that it will loop endlessly, therefore playing until your viewer leaves the page. This is what makes a cinemagraph a true attention-getter for entrepreneurs and internet marketers!

What Are Cinemagraphs Used For?

1. Moving images for backgrounds

2. Animated GIF’s for social media

3. Attention-Getting social media posts

4. Video clips within your other video productions

5. Advertisements

6. Email announcements

7. Presentations

8. Get Creative!

Do I Have to Make a Cinemagraph?

If you’re skilled in photography, video, and technology, then perhaps you can make your own cinemagraphs.

However, most of us don’t have the skills or time to create our own, especially if it means learning a new software program. As small businesses and entrepreneurs, our time is much better spent doing what we are good at, right? Because that’s how we earn our money.

So, the best answer is, no, you don’t need to create your own. And if you’re worried that you don’t have the resources to make a large investment in eye-catching cinemagraphs for your business, then you’re in luck.

How Do I Get a Cinemagraph for My Design Projects?

You can purchase one at a time directly from a stock agency or professional.

Or, even better, you can get a bundle of 27 cinemagraphs for the price of just one from a stock agency. Grab a bundle of stunning moving images that can be used for multiple projects and you won’t have to stress.

Can I Save Cinemagraphs as animated GIF’s or mp4 video?

Yes, you can save them as GIF’s or in other standard video file formats, such as mp4.

Since a cinemagraph image already has motion, you don’t need to add any video to it. However, you will need to save it in a video file format.

In The Graphics Creator, you can choose whether to record your project as a GIF or Webm… then you can download and convert to another video file (say .mp4 or .mov) if needed. Social Media platforms often require different video formats. Webm works great on Facebook, for example, but you’ll need to use .mp4 for a Pinterest video.

Take a look at the video to find out how to record a Moving Image in The Graphics Creator with just a couple of clicks:

https://youtu.be/Fk5qVTv6Ubg

What Software Do I Need to Create Ads or Social Media Posts With Cinemagraphs?

You can save time and money by creating your own ads and social media posts, whether or not you’re using cinemagraphs. Spending hundreds to thousands of dollars for images you need every day in your business will only drain your budget and you’ll have a hard time continuing to pay for all you need.

Instead, take a look at this easy-to-use tool, so that all you’ll need to do is add text to your moving images (you can still choose your own fonts, colors, and design elements if you’d like).

Then grab your pre-designed cinemagraphs and have an attention-getting motion image in just minutes.

With only a small investment in time and money, you’ll have access to spectacular images that get you more traffic, more clicks, and more sales.

How to create your own tshirt designs that sell (2020)

The Creatorpreneurs Academy brings together strategic marketing with eye-catching design so you have the tools and skills to grow your business fast.

Hey Creatorpreneurs! If you need another stream of income or want to promote your own business in a fun and unique way, then designing and selling t-shirts is for you.

As an online entrepreneur, you already know the value of having a virtual presence… on social media, a website, a blog, etc. But that doesn’t mean you can’t grow your business by mixing in some offline strategies.

https://youtu.be/MJHBKWbXwmQ
Watch the video to learn how to make money with graphics!

Yes, You Can Earn Money by Selling T-shirts

Understandably, you don’t want to waste your time on another project that doesn’t lead to increased sales. But selling t-shirts, or other “on-demand” goods is easier than you think and requires little to no investment. If you want to order your own t-shirt for promotional purposes, such as to take pictures of it or wear it, then you will have to buy it. Otherwise, you can start for nothing!

Here’s how it works: You choose the sales price and keep 100% of the profit. For example, the base price for a t-shirt is $10 and you choose to sell it for $20, you would keep $10 in profit.

Basically, if you sell 10 t-shirts per week, you’ll make $100 (that’s an extra $400 per month!). Keep in mind also that you only have to make the design once, so little of your time is required once your design is set. And, as mentioned before, you don’t have to spend any money upfront. So, you really do keep all of the profit.


How to Design a T-shirt

This is the fun part! You can get as creative as you’d like while designing your t-shirt. First, make sure you’ve watched the video to learn how to create your t-shirt designs.

If you don’t already have The Graphics Creator software, just get it online and log into your account to start creating.

Further, if you’d like help with ideas or feedback on your design, join the Laughingbird Software Creatorpreneurs community.

Now, read below to find out how to sell your awesome new t-shirt designs.


How to Sell Your T-shirt

What makes selling t-shirts online so easy is that some businesses will produce your product on-demand. This means that you don’t have to buy inventory upfront before you even make any sales!

Further, buyers come to these well-known companies looking for cool or funny t-shirts. So, you don’t have to rely exclusively on your own marketing. There’s already a customer base.

If you watched the video, you saw Marc showing you how to create and download your design from The Graphics Creator and upload it into Teespring to sell your t-shirt. This is the easiest way to make any graphic design into a sellable t-shirt or other printed product.

Try the online Graphics Creator software for free and start selling t-shirts designed by you.
Click to try the online Graphics Creator for FREE!

How to Print Your T-shirt Design

Take a look at how Teespring will print your t-shirt on-demand. As an entrepreneur, you have enough to do without worrying about orders and shipping.

Thankfully, Teespring produces your t-shirts after an order is placed. You simply create your design and upload it. When you get a sale, Teespring handles order production, shipping, and customer support for you. Super simple!

Next, check out their Getting Started video and guide.

Website to help you sell t-shirts online

Here’s one more super cool thing worth mentioning. Teespring is great because it gives you a way to actually sell your products directly from Instagram, YouTube, and Twitch.


So there you have it entrepreneurs… one more way to earn money each month. Creating and selling t-shirt designs is passive income once you’ve created the design. In other words, you can sell your design over and over without much effort at all.

So why limit yourself to selling one design when you can create 10 or 20?! Some of Laughingbird Software’s Creatorpreneurs even make a full-time business out of selling on-demand t-shirts and other products using The Graphics Creator to make their designs.

Drive Traffic with a 4-Step Social Media Marketing Plan

The Creatorpreneurs Academy brings together strategic marketing with eye-catching design so you have the tools and skills to grow your business fast.

Social media marketing is an ongoing process and can be rather time-consuming if you don’t manage it. However, having a consistent plan can can make it easier as well as increase traffic to your website, getting you bigger results, faster.

This article in our Creatorpreneurs Academy series will help bring you traffic from any social media platform by completing 4 defined steps.

The 4 Steps to Get More Traffic with Social Media

1. Plan Your Social Post Content

The idea here is to create content for your target audience. Your focus should be on showing your audience what they need to solve their biggest problem in your niche.

First, consider how often you will post great content on one or more of your social accounts… Twice a week? Daily?

Then create a list of topics that address your audience’s troubles and the solution you can offer. Ask yourself if what you’d like to offer will be something they’ll want to share with others. After all, getting others to share can be the biggest driver of traffic to your site!

To stay on track and provide consistent content, use a simple calendar that reminds you what content you intend to provide on each post, what social platform you plan to share it on, and how often you will share.


2. Create a Brand Story.

Now that you have your content ideas, make a brief “story” out of each one. This is your chance to tell people what your brand is all about… how you understand their problem and how you can help them with it.

Consider making your story into a quick How-To lesson, product demonstration, or story about how your offer helped a customer in real life. Just keep in mind that, because this content is for your social media posts, you need to brief but compelling.

Therefore, give your audience a “teaser” of what they’ll get if they click on your social link. For example, if you are offering a “how-to” article, you might tell about how one customer followed your steps and got double the traffic to their site. Then ask them to click a link to find out how they can do this too (see step #4 below on using a “Call-to-Action”).


Laughingbird Software Brand Design for Facebook Marketing example

3. Add Eye-Catching Visuals.

As is true anywhere on the internet, striking visuals in your social media posts will capture and hold your audience’s attention. Please, please, please don’t get tempted to add a simple colored Facebook background to your post, or worse, to leave out an image altogether!

Just as when you’re telling your “story” above, stunning, unique visuals tell them that they can trust you and that you’re capable of helping them. Besides, you won’t even get noticed if you don’t use graphics and images that catch the eye.

The truth is, the few minutes you spend creating a graphic will be worth it. And, yes, you can create an image in just a few minutes with the right tool.

Simply put, it’ll bring more traffic to your website. This is for two reasons: First, people are much more likely to click on an image than to hunt for a link in the text. And second, you’ll look more appealing, trustworthy, and professional.

How to Use Graphics to Drive Social Media Traffic

The number one most important piece of a perfect social post is your image. If your post doesn’t quickly capture attention, you’ll get very few views, if any.

Words are competing for attention everywhere. And even if you’ve written an amazing story and offer, they may never be seen without first capturing your audience’s attention with a stunning graphic.

Watch this video to learn more about creating eye-catching social media graphics:

https://youtu.be/_ZHXX_OMKjk

4. Include a Clear Social Call-to-Action.

A “call-to-action” (CTA) tells viewers exactly what you want them to do next. On social media, this is just as important as in a blog article, video, or on a web page. You want your planned post to share a story, have a big attention-getting graphic, and then tell them exactly what to do with that information.

In most social posts, you will tell them to: “Subscribe”, “Learn More” “Find out How To…”, “Share”, and perhaps even “Get The Offer”.

Before writing your CTA, have a clear idea of what action you want a potential customer to do. And, decide whether you will direct them to your website, blog, video, podcast, or sales page?

How to drive traffic to your website with a 4 step social media marketing plan.
Share on this image on social media

Be Consistent with Your Social Media Marketing Plan

In order to get more traffic, you must consider this a somewhat long-term plan. Posting a few times on any social media rarely doubles your traffic instantly. However, staying on course by consistently following these four steps with each piece of social media content will bring you more traffic.